Milesight社のLoRaWAN温湿度センサーEM300-THのデータを屋内用LoRaWANゲートウェイUG65で受信し、HTTPでNode-REDに送信してみましたのでその方法をご紹介します。
EM300-THの設定
Milesight社のLoRaWANセンサーを使用する場合は、ToolBoxというスマートフォン用のアプリケーションが必要です。
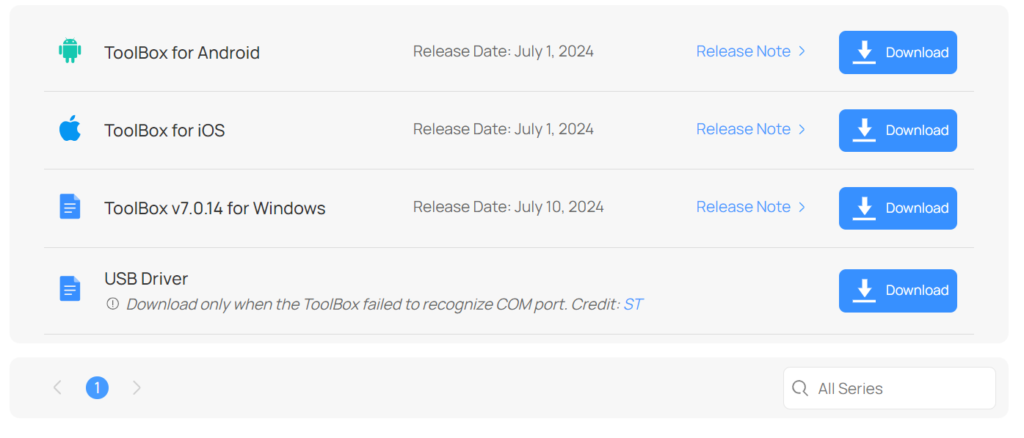
https://www.milesight.com/iot/resources/download-center/
私はiPhoneなのでAppStoreでダウンロードしました。
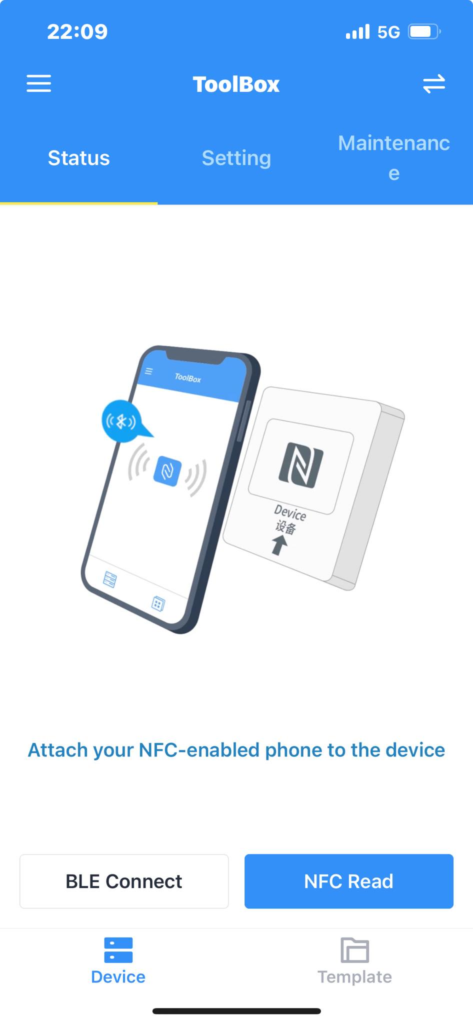
アプリを立ち上げ、Statusにしてセンサーの上にスマートフォンのNFC読み取りを、センサーのNFCマークの部分に合わせます
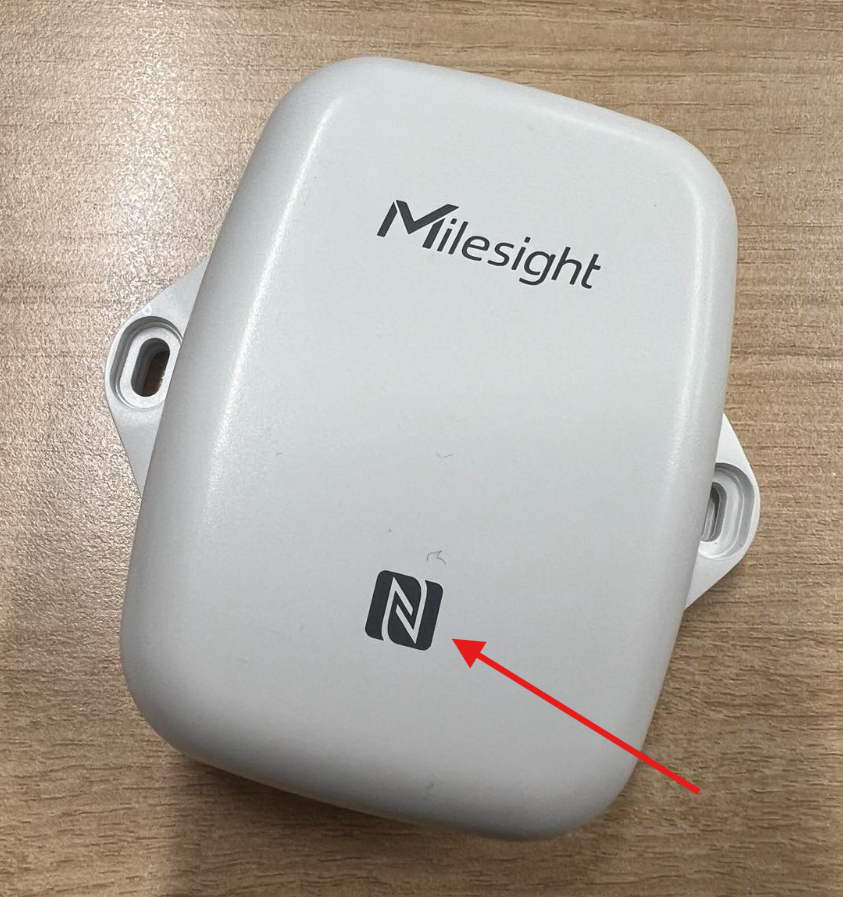
NFCはこのあたりです。iPhoneのNFC読み取り機はカメラの横あたりで結構上です。
合わせたら、NFC Readをして状態を読み取ります。
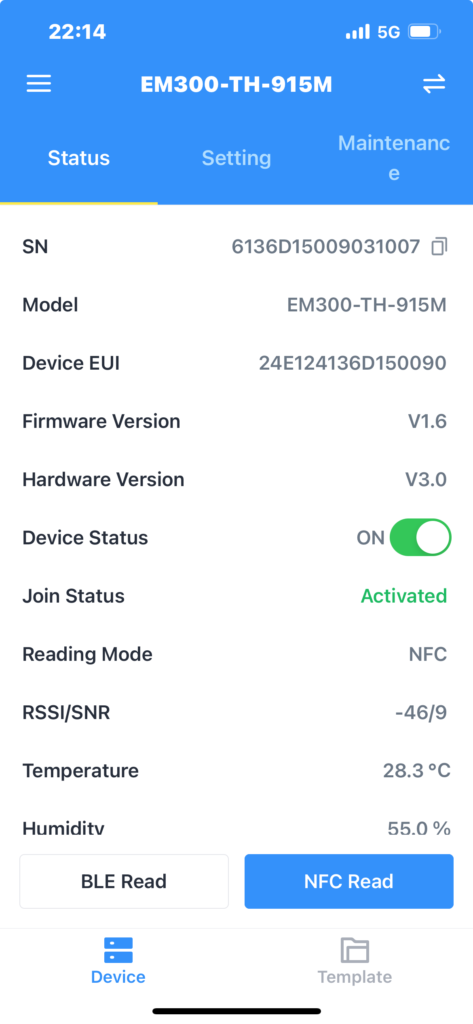
すると、このようにセンサーデータが表示されます。
実はこのセンサー、以前にもLoRaWANゲートウェイで受信できるようにしていたのですが、一度、データ受信設定をしたデバイスは初期化しないと新しいゲートウェイではデータ受信してくれません。
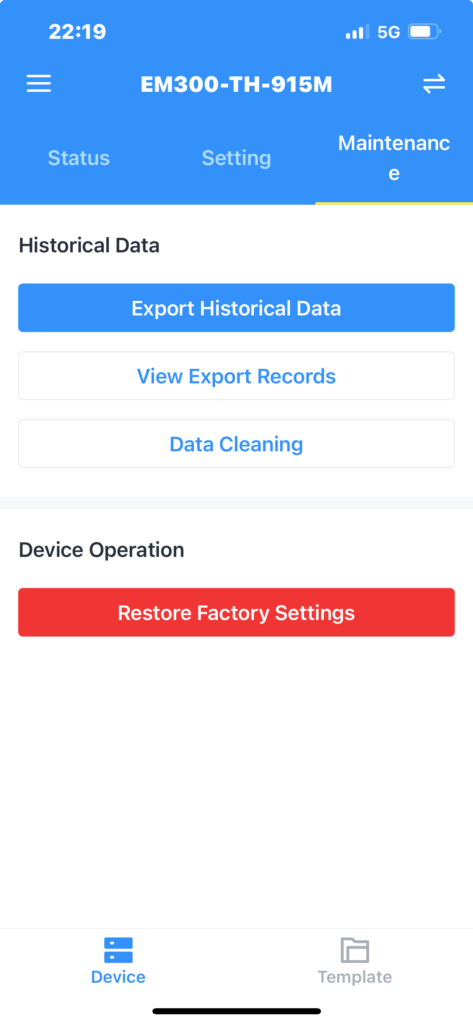
なのでMaintenanceタブに移動し、Restore Factory Settingsを押し、再度NFCに近づけてセンサーを初期化します。
LoRaWAN UG65でPayload Codec
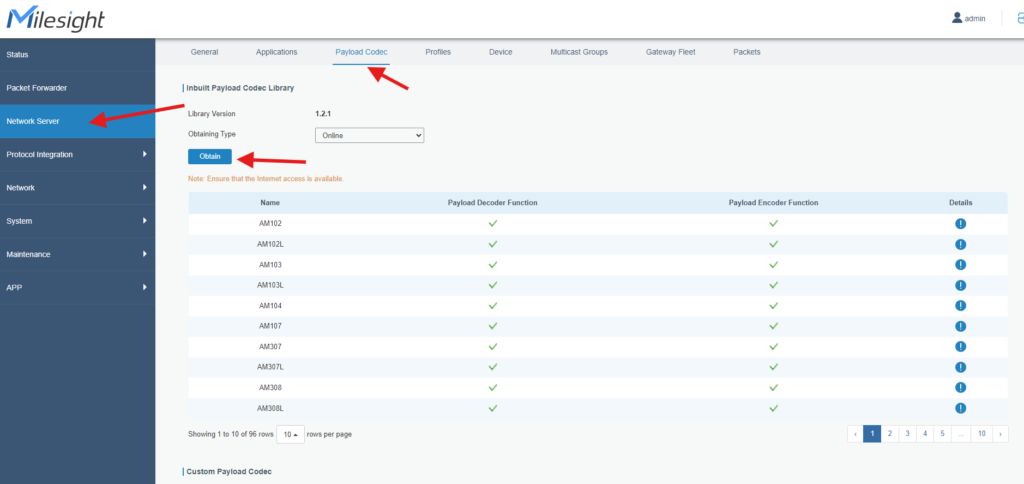
左側のNetworkServerがセンサーデータ受信に関連するメニューになります。
まずは、Payload Codecを確認。こちらはMilesight社のセンサーのTelegramを解析するLibraryがあり、Obtainを押すとInternetに接続していれば最新版を読み込みます。
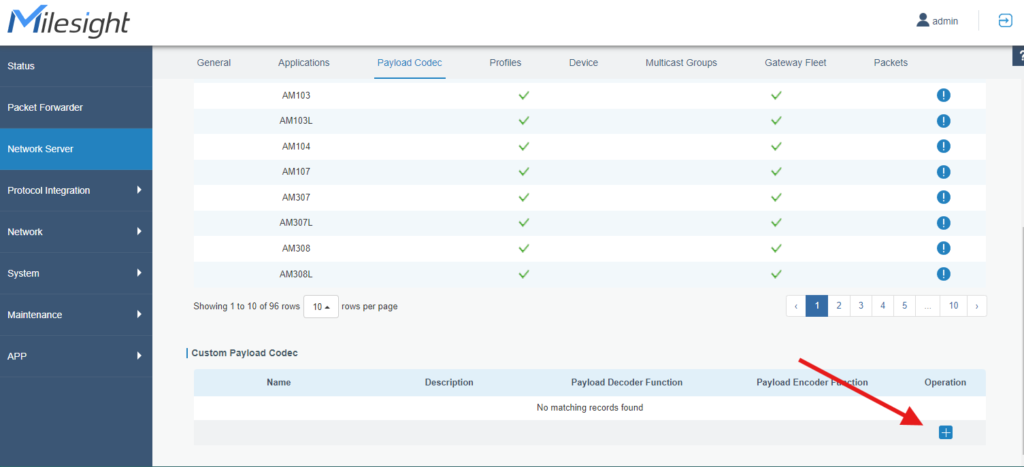
画面下にCustom Payload Codecの右下のプラスマークを押せば、TelegramをDecodeするスクリプトを書くことができます。
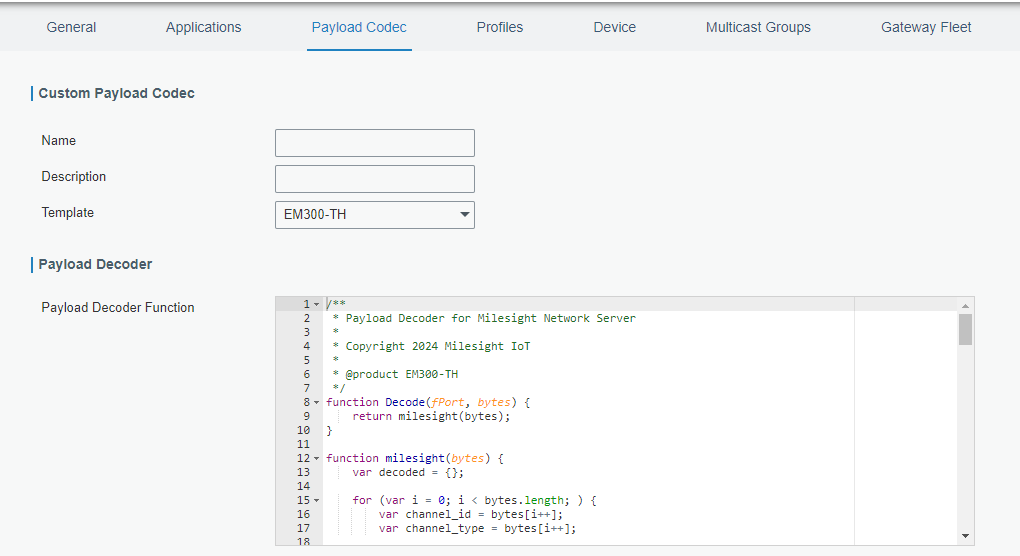
Milesight社のセンサーのDecoderスクリプトも確認することができるので、これを参考にして自分でかくのもありです。
Applicationsで受信したデータの取り扱いを設定
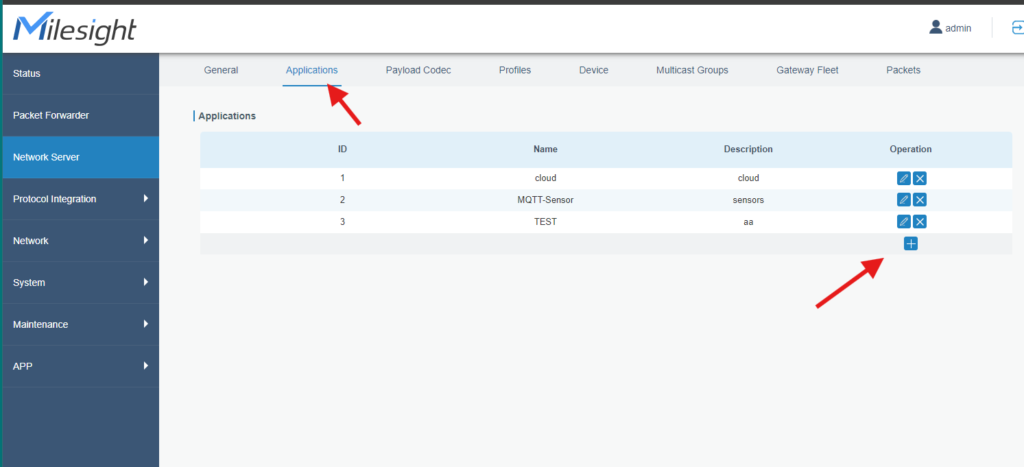
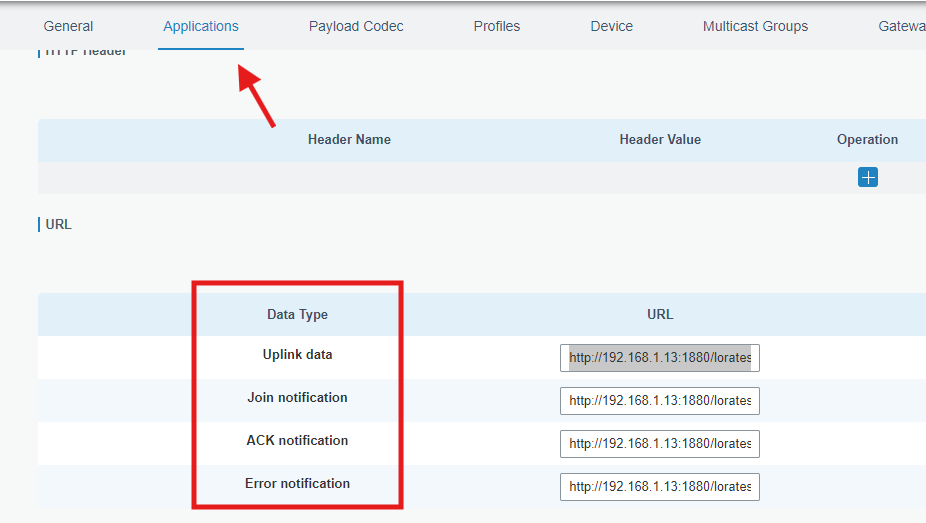
Applicationsの右下のプラスマークを押すと受信したデータをどこに送るのかの送り先が設定できます。
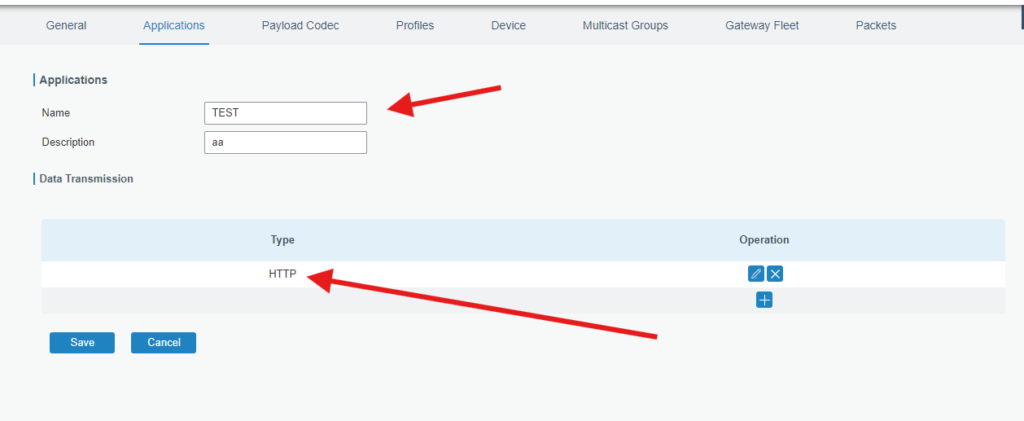
こちら、TESTという名前でHTTPで送る設定です。
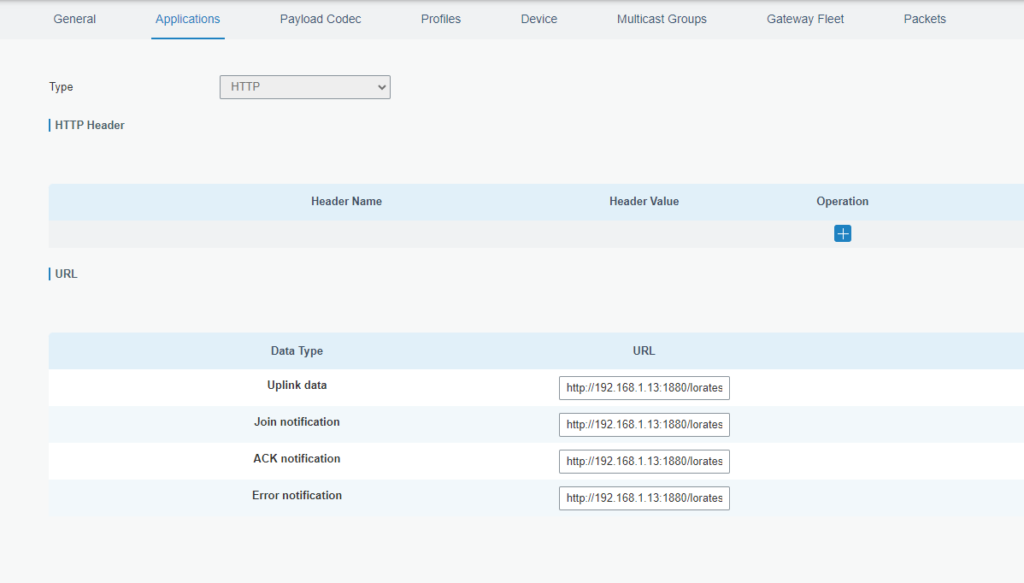
Headerや送り先をこのように設定できます。
ちなみに、ここらへんの設定方法はinnon Energy社の動画がとても勉強になります。
Deviceの追加
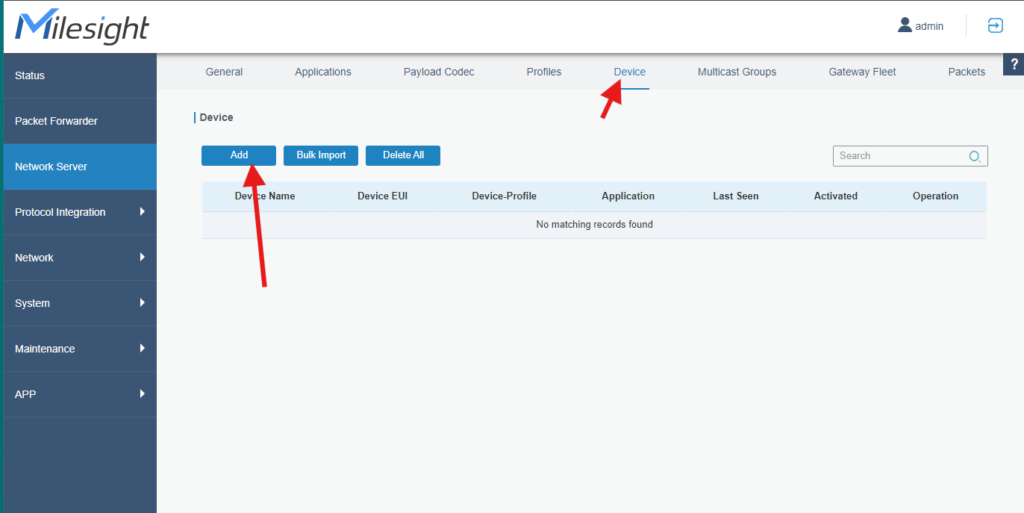
DeviceタブからAddを押します。
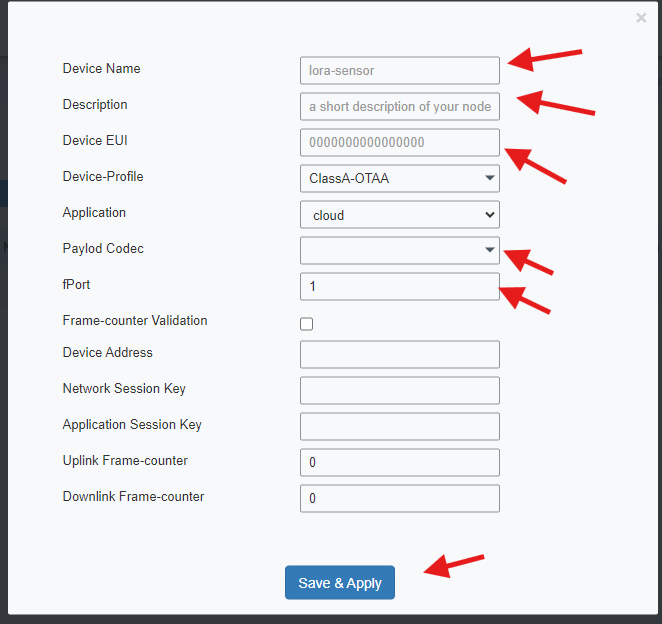
入力するのはこちらです。
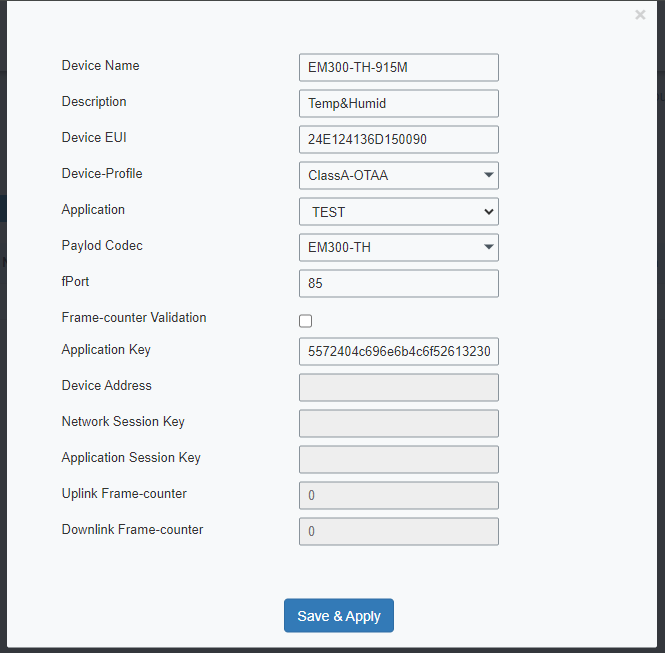
重要なのは、DeviceEUIとfPortです。
DeviceEUIはToolBoxで確認し、fPortはデフォルトで85ですが、ToolBoxで変更もできます。
また、Applicationは先ほど作成したTESTにしました。

Activatedに緑でチェックマークが入ればデータ受信成功です。受信するまで少し時間がかかり、ブラウザリロードする必要があります。
もし、チェックマーク状態にならない場合は、Restore Factory Settingをしてみてください。
Node-REDのHTTPノードで受信
本当はUG65でNode-REDが使えるのですが、まずは、HTTPでデータを送信してみました。
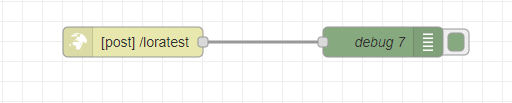
Node-RED側のHTTP inノードとdebugノードをつなげただけです。
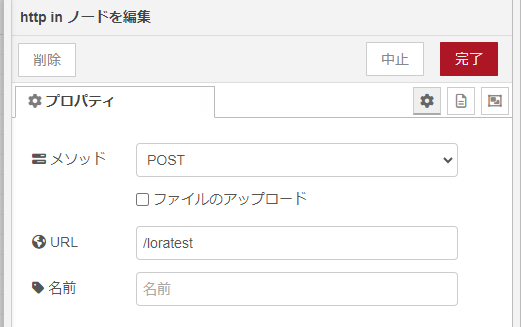
メソッドはPOSTになります。
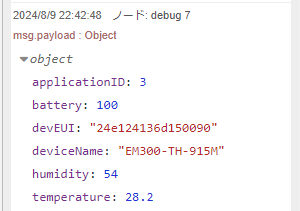
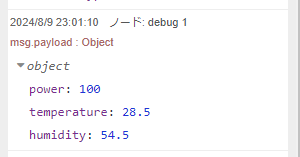
このようにhumidityとてtemperatureを受信します。
ApplicationsのDataTypeによって送られてくるデータが違うのですが、そこは自分でためしてみてください。
UG65のNode-REDでの受信方法
UG65でもNode-REDが使えるので、そちらでEM300-THのデータを受信する方法です。
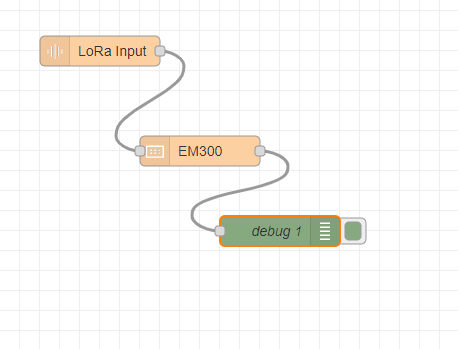
LoRa inputノードにDecoderノードを接続
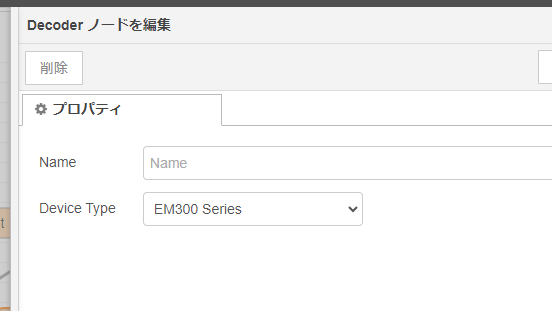
DecoderノードではLoRaのDeviceTypeが選択できるのでEM300を選択
すると、このようにEM300-THのセンサーデータをUG65のNode-REDで受信することができます。
まとめ
以上、LoRaWANの温湿度センサーEM300-THのデータを屋内用ゲートウェイUG65で受信する方法について解説しました。
UG65はLTE SIMを使って、MQTT送信もできるので、今後はその方法も検証してご紹介したいと思います。