M5StickC Plus
M5StickC Plus は、M5StickC の大画面版の製品です。BluetoothとWi-Fi通信が可能で、赤外線、RTC、マイクロフォン、LED、IMU、ボタン、PMICなどのハードウェアが内蔵されています。
今回は内臓されたハードウェアの一つ、 IMU (加速度センサー)の機能を用いて振動検知機能を実現します。
M5StickC Plus の操作方法
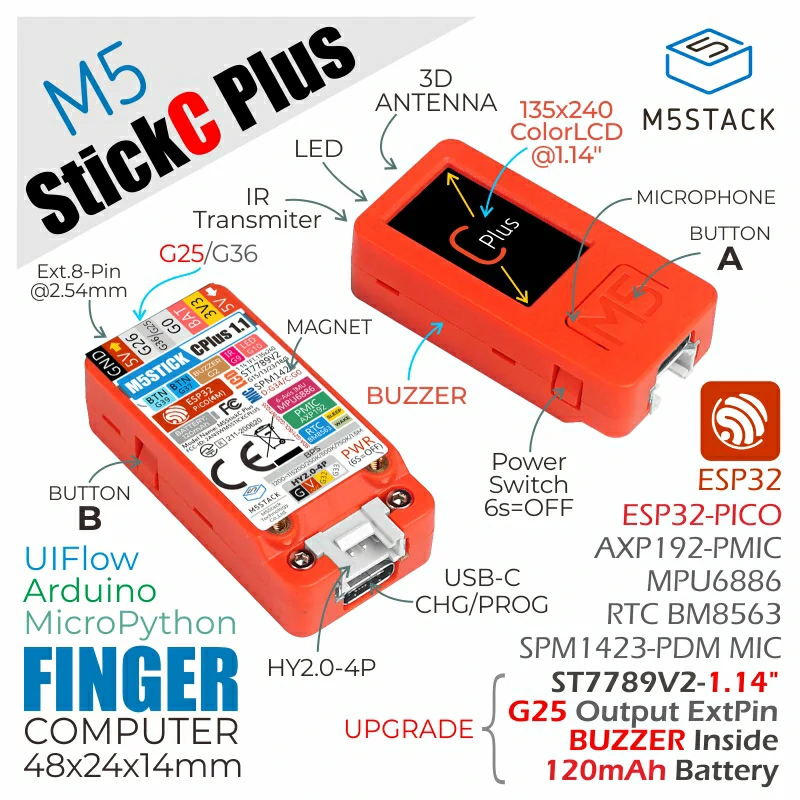
製造元商品ページからの引用です。
ブザーやLEDなどの配置はこのようになっており、電源ボタンはONにしたいとき長押し2秒、OFFにしたいとき長押し6秒です。電源がOFFの状態でType-Cのコードを指すと自動で起動します。
起動時にデフォルトでいくつかの機能を備えた画面が表示できますが、USBでPCとつないで好きなように機能をカスタマイズできます。
ワークフロー
・M5StickC Plus の開発環境を整える
・M5StickC Plus の動作確認
・Arduino IDE を準備する
・M5StickC Plus にプログラムを焼きこむ
・NodeRED で フローを作成する
今回は全体を通して、
M5Burner, M5Flow, Arduino IDE, NodeRED の4つのソフトウェアを使用します。
M5StickC Plus の開発環境を整える
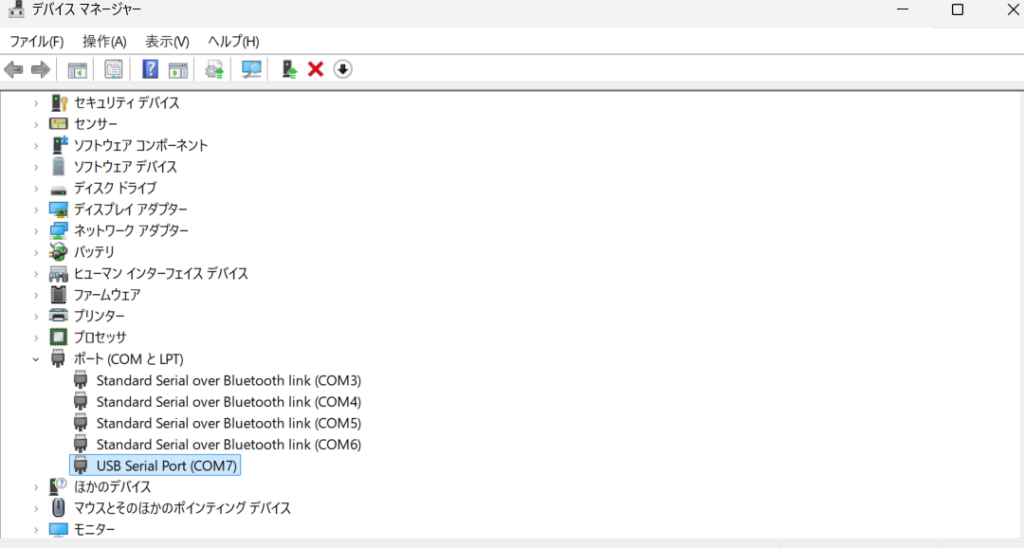
はじめに、USB Type-C ケーブルでPCと M5StickC Plus 本体を接続しておきます。
デバイスマネージャーから接続した USB が COM いくつか把握しておきます。
M5Burner をインストールします。PCのOSに合った M5Burner をダウンロードしたら Zip フォルダを解凍しアプリケーションを開きます。
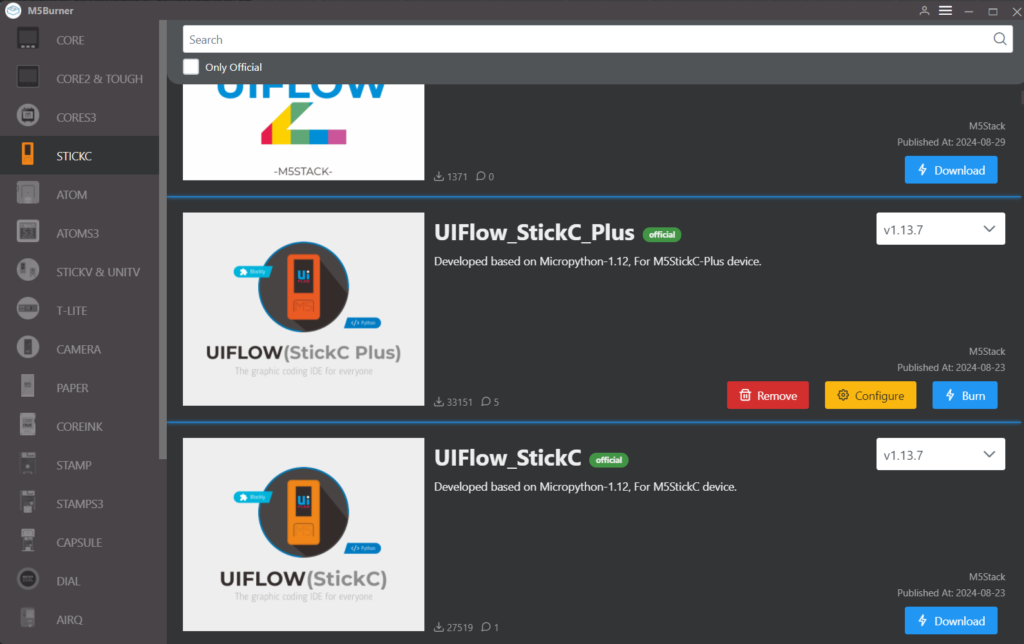
右側のSTICKCを選択します。
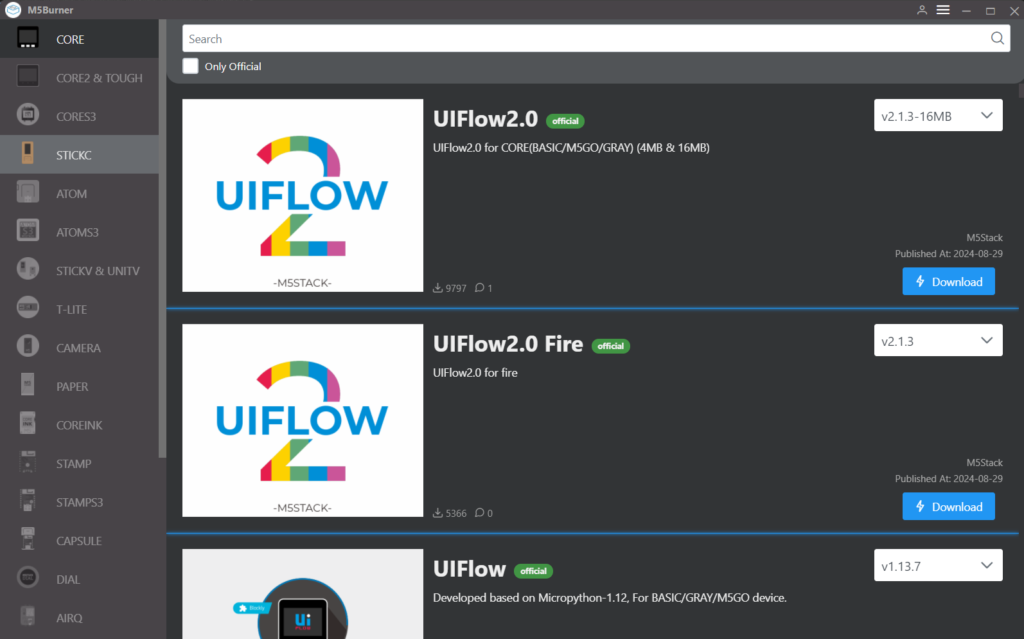
UIFlow_StickC_Plus を見つけ Download し、Configure をひらきます。
今回接続している USB の COM は 7 だったので COM7 を選択し、Load しました。
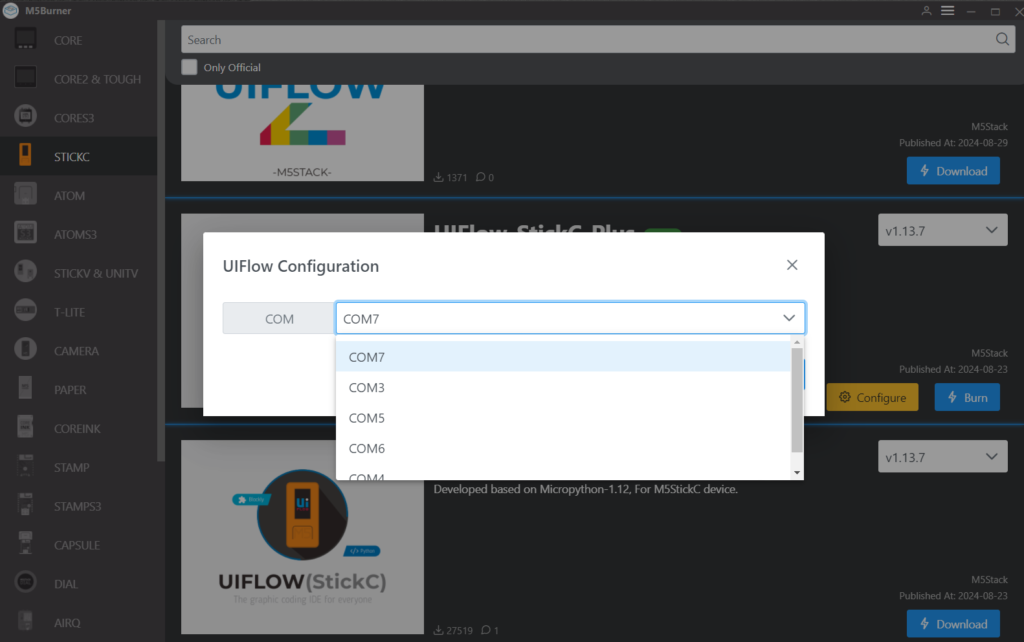
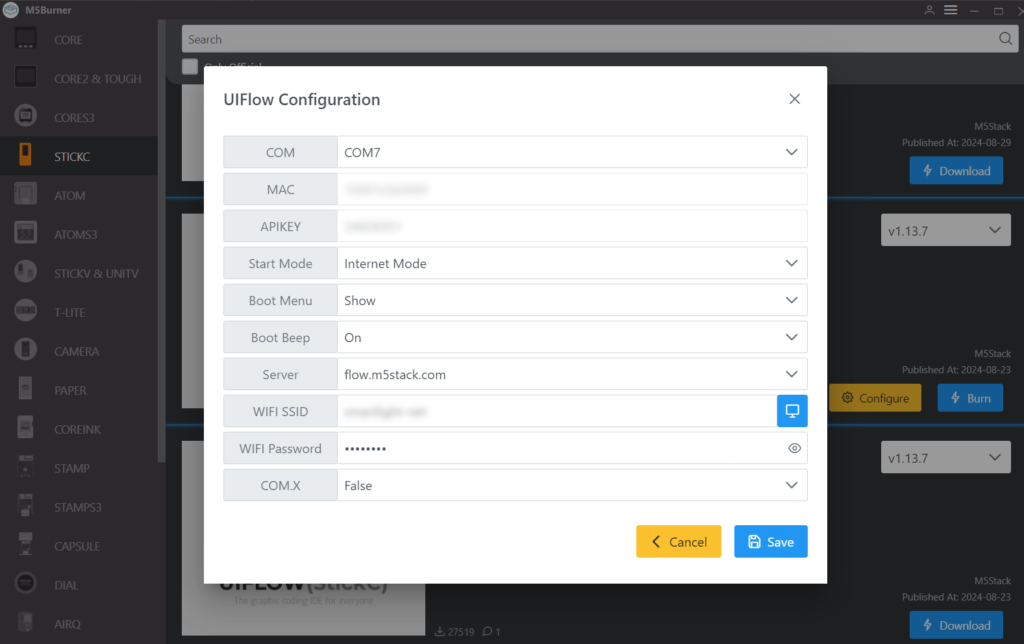
Load すると、Configuration の設定画面になります。
接続する WiFi の SSID と Password を入力し、下記のような設定で Save します。
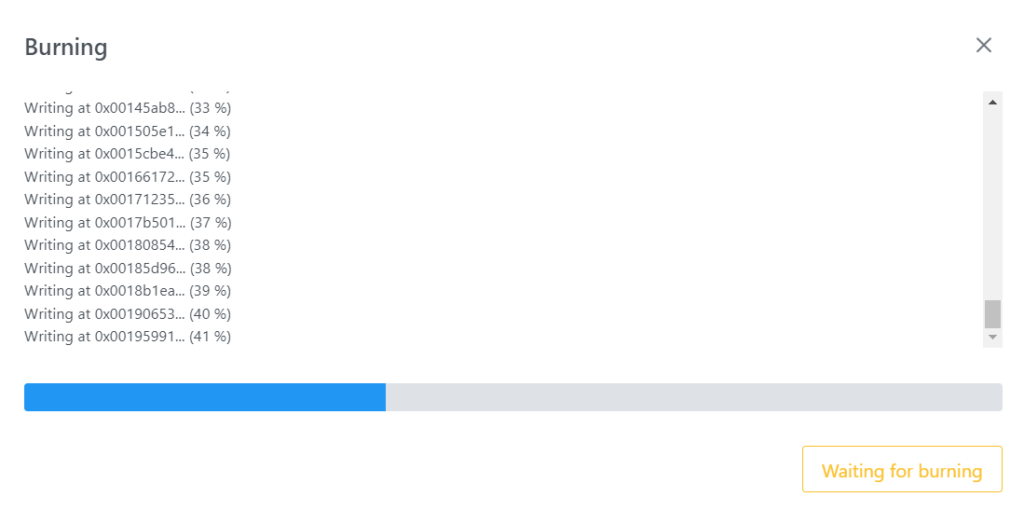
Burn を押下し、COM の設定や WiFi の設定を確認したら NEXT へ。
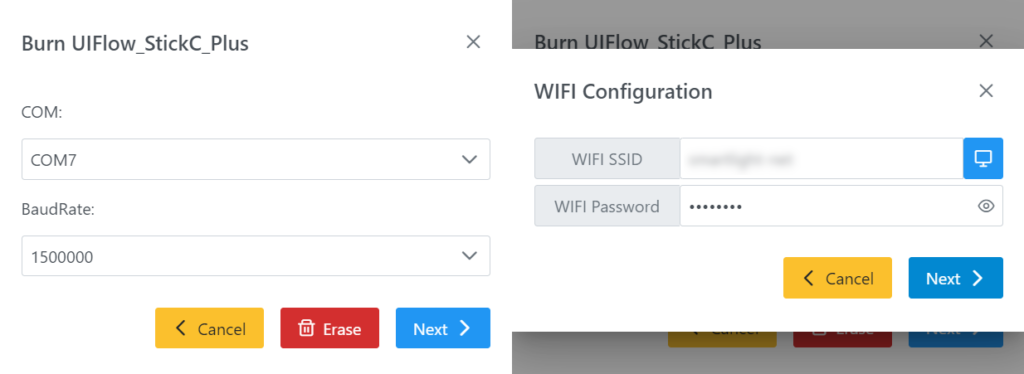
ファームウェアのインストールが実行されます。
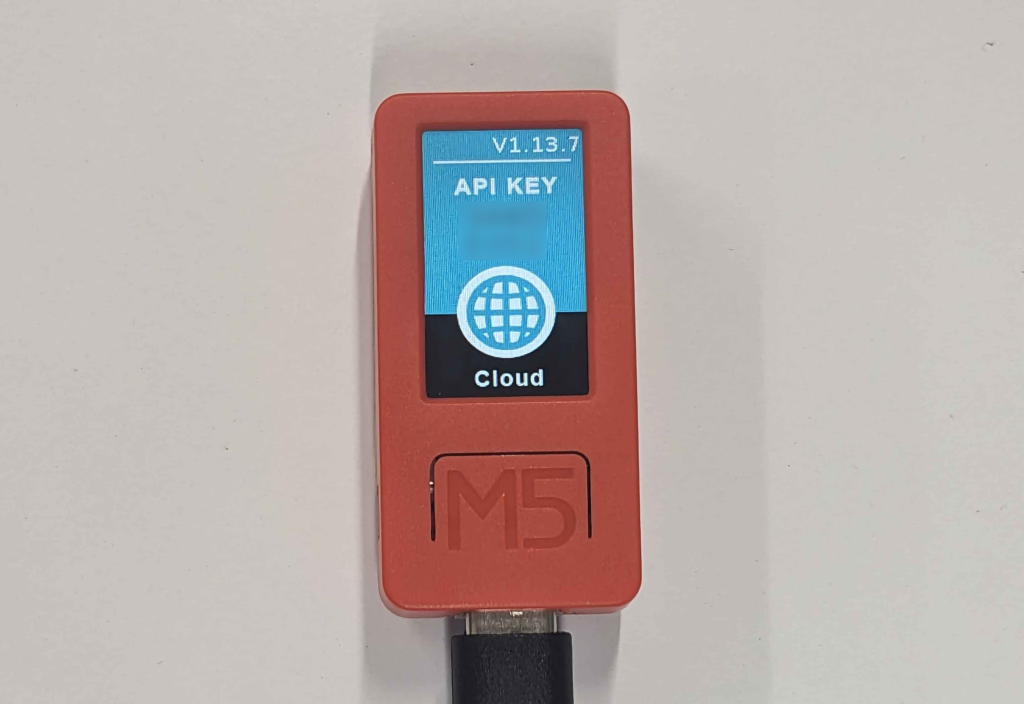
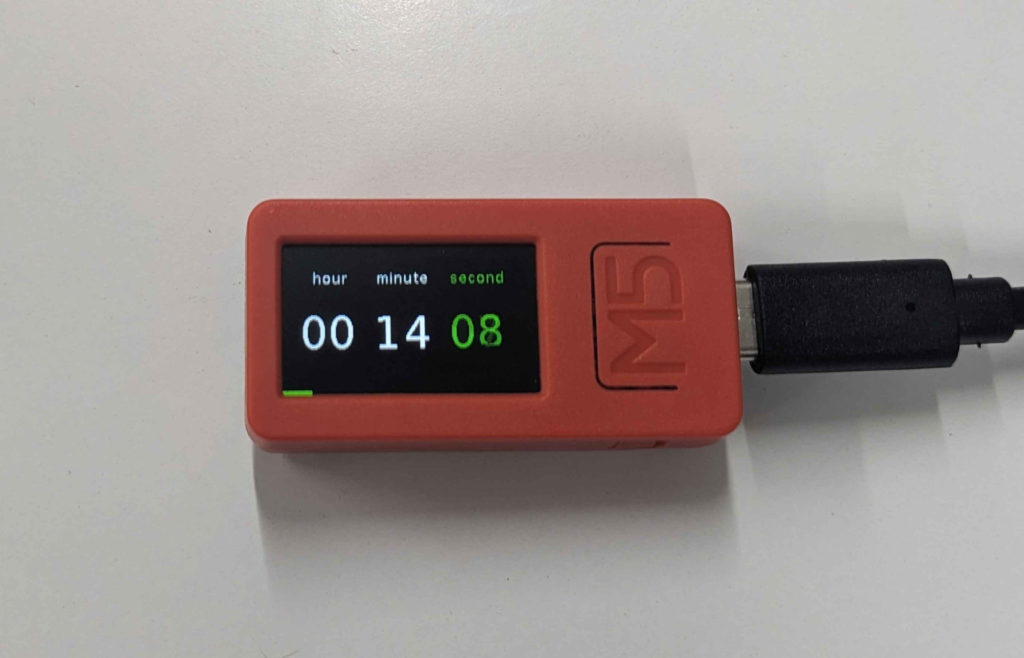
M5StickC Plus 本体が写真のようになっているはずです。
画面には本体の API KEY が表示されています。WiFiに接続されました。
M5StickC Plus の動作確認
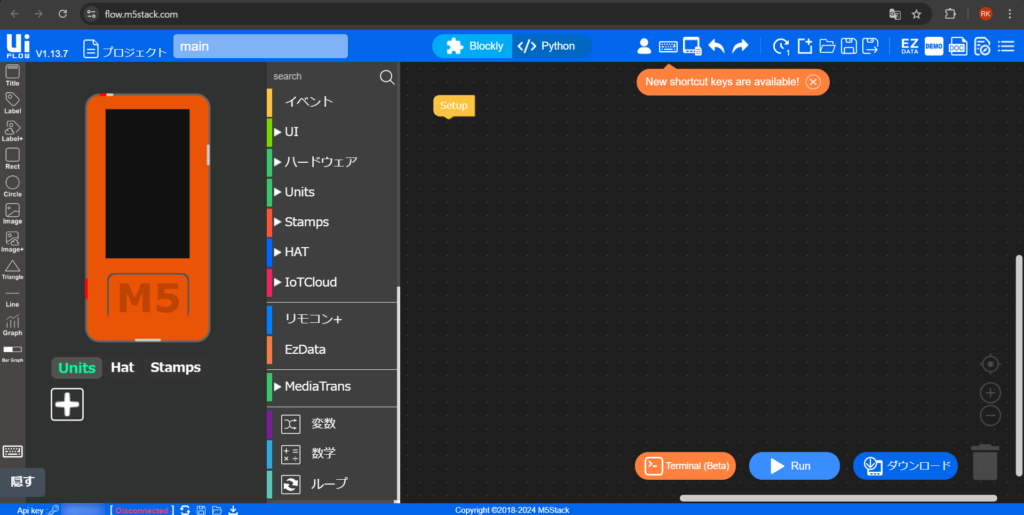
M5Flow(ウェブ版)を開きます。画面右上の DEMO を押下します。
※タブを縮小していると表示されない場合があります。
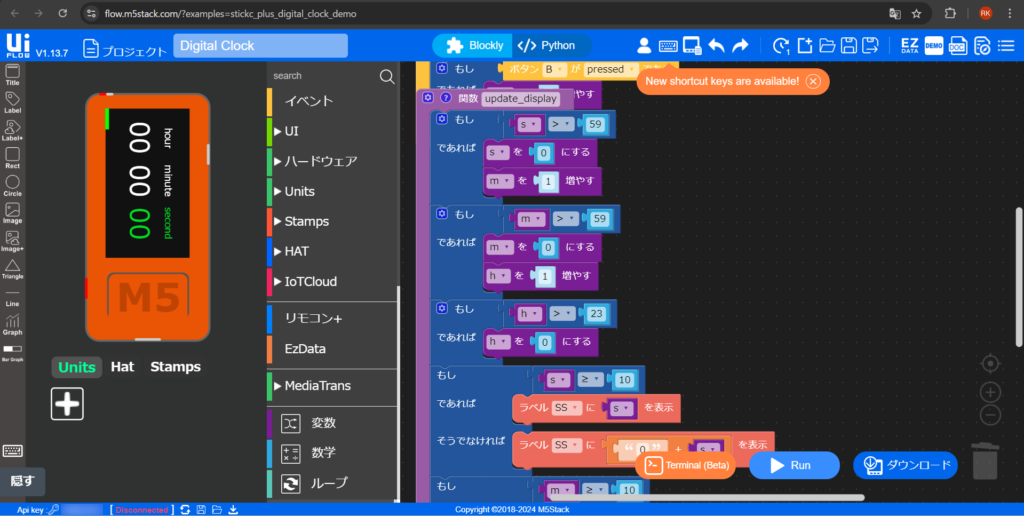
左上の Digital Clock を押下し Load します。
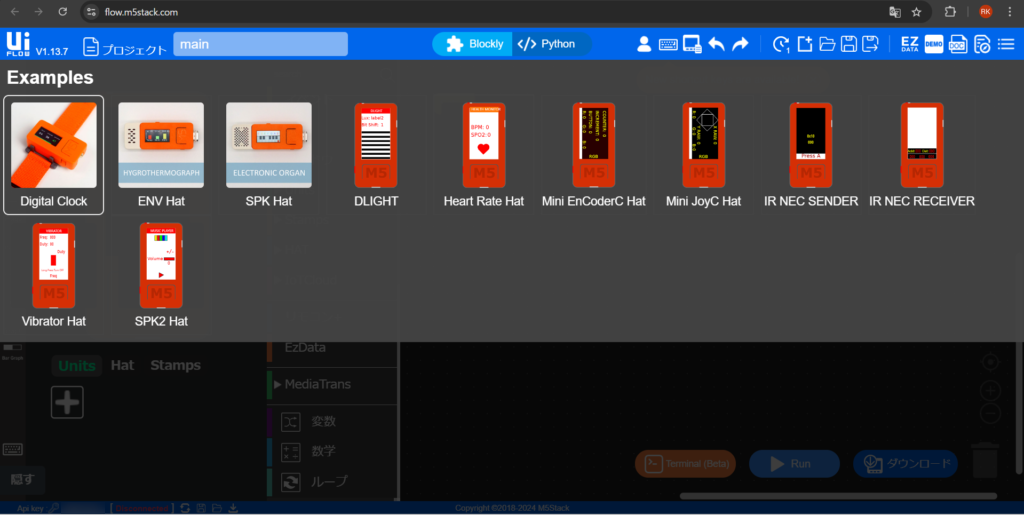
Load すると、サンプルコードが表示されます。
M5StickC Plus 本体の API KEY を用いてサンプルコードを実行します。
画面左下の API KEY を押下します。
本体に表示された API KEY を入力して OK を押下します。
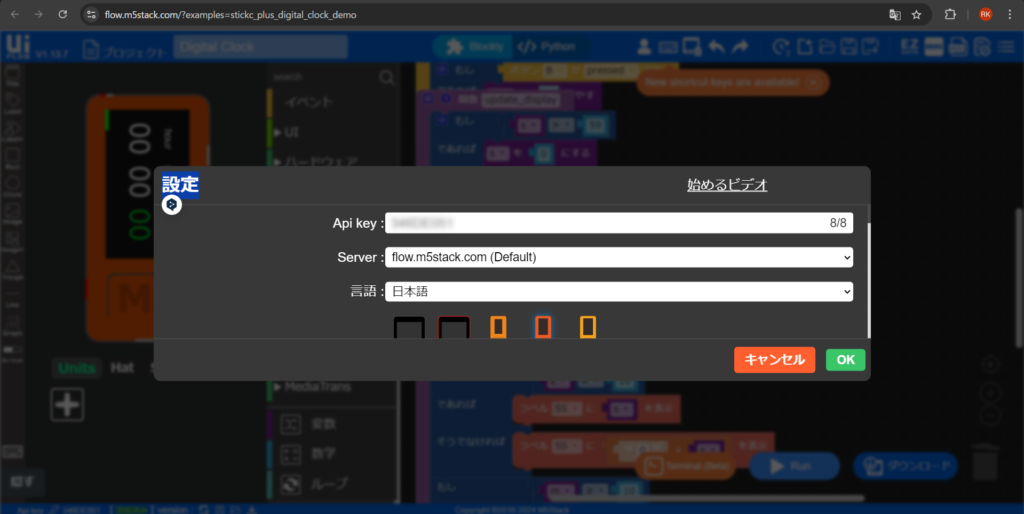
RUN ボタンを押下。画面右下が Connect になり、本体でタイマーが作動すれば動作確認終了です。
Arduino IDE を準備する
Arduino IDE 公式サイトからソフトウェアをダウンロードし、インストールしておく。
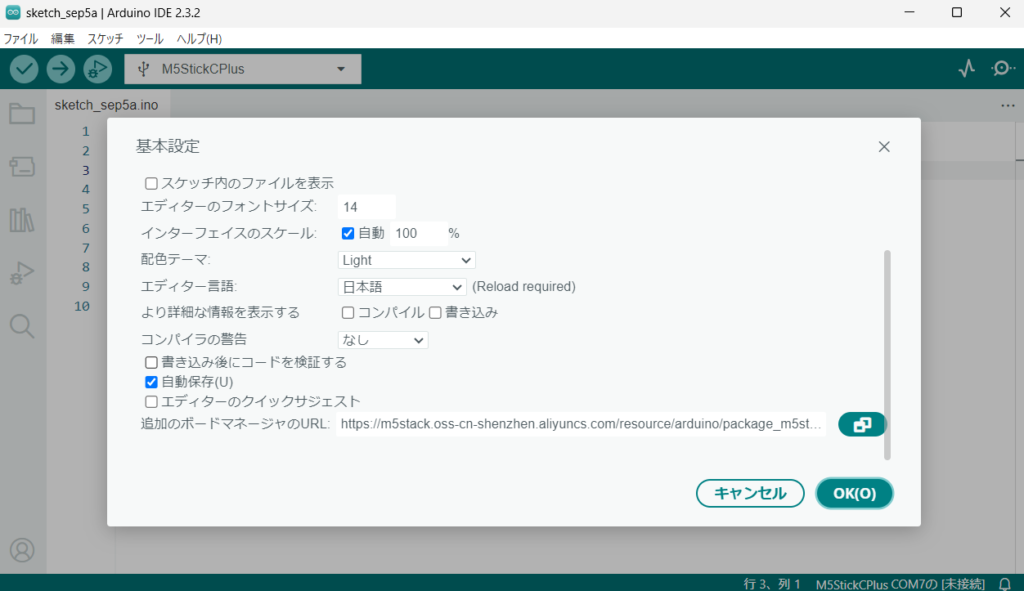
Arduino IDE を開き、ファイル→基本設定… を選択。
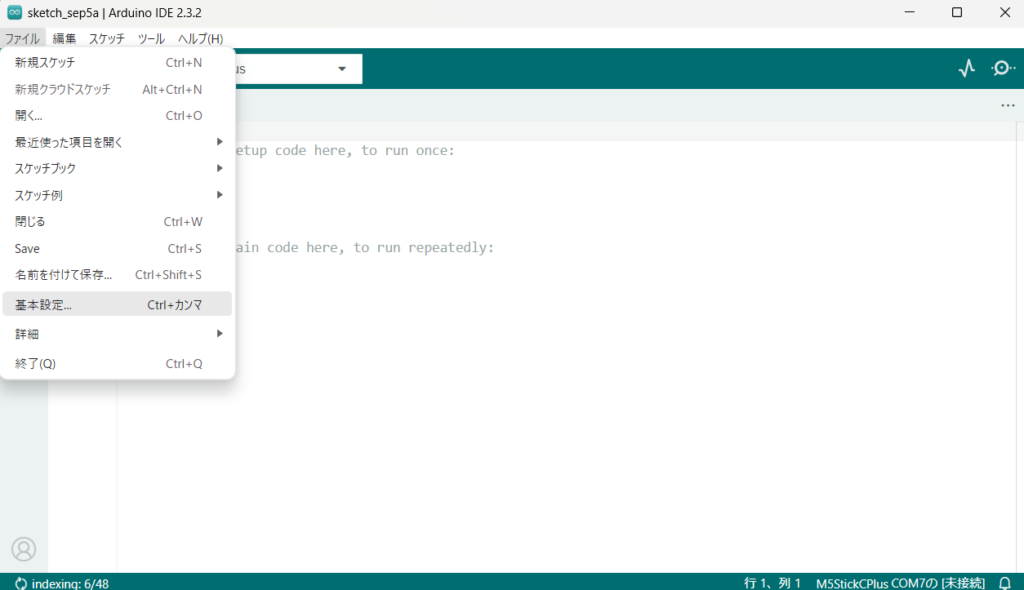
追加のボードマネージャのURL欄に、下記URLを入力しOK。
「https://m5stack.oss-cn-shenzhen.aliyuncs.com/resource/arduino/package_m5stack_index.json」
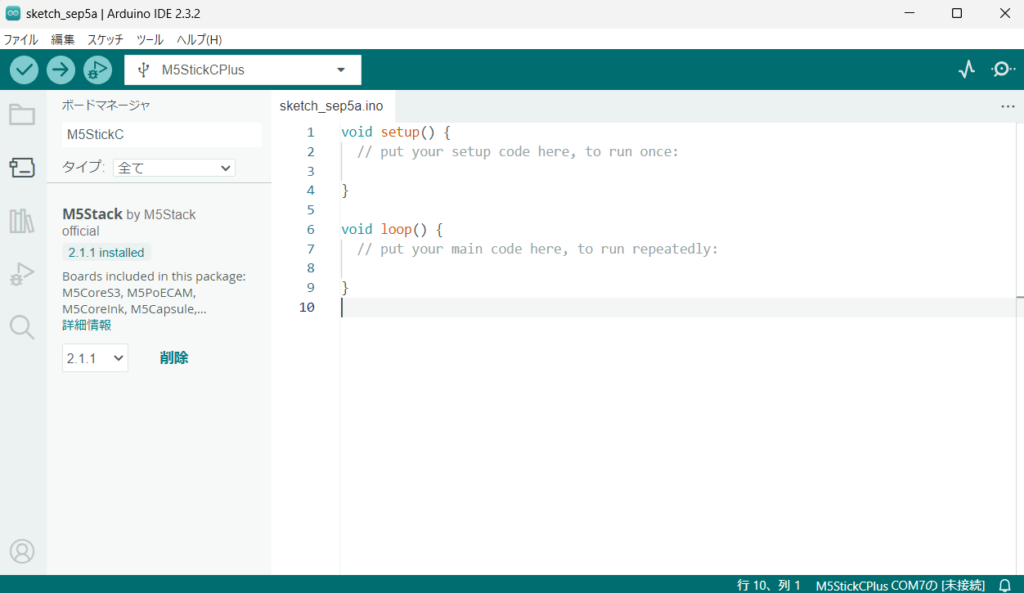
次に、左側メニューの2つ目のアイコンを押下。
表示された検索バーにて検索し、「M5Stack by M5Stack official」をインストールする。
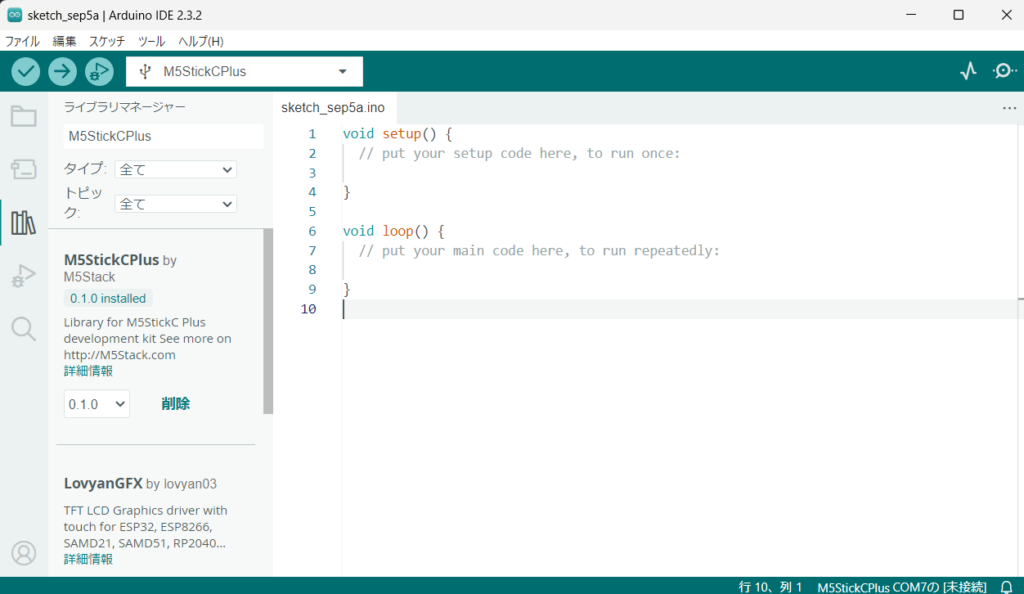
次に、3つ目のアイコンを押下。
表示された検索バーにて検索し、「M5StackCPlus by M5Stack」をインストールする。
Arduino IDE を再起動する。
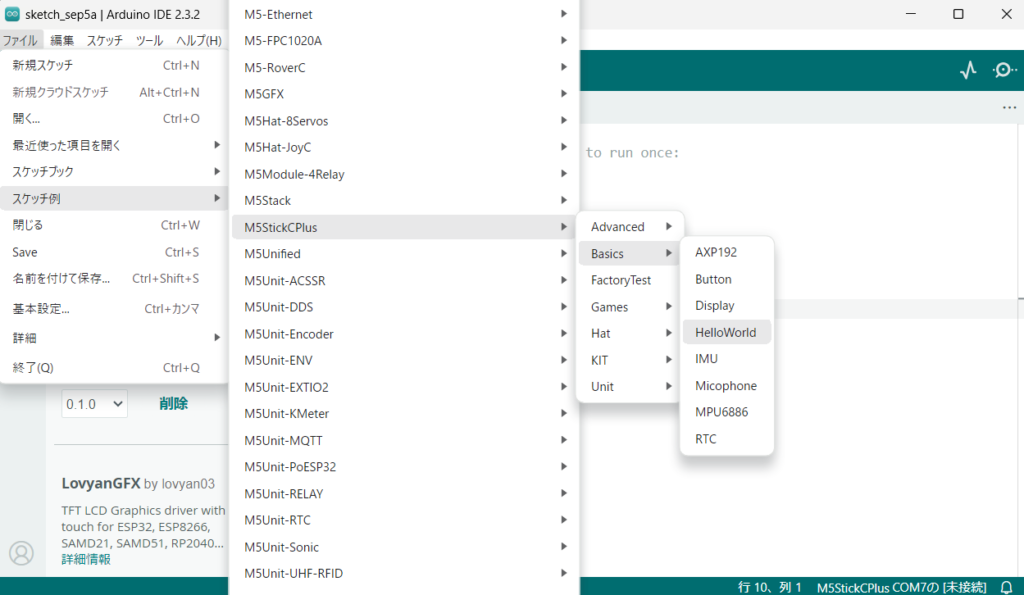
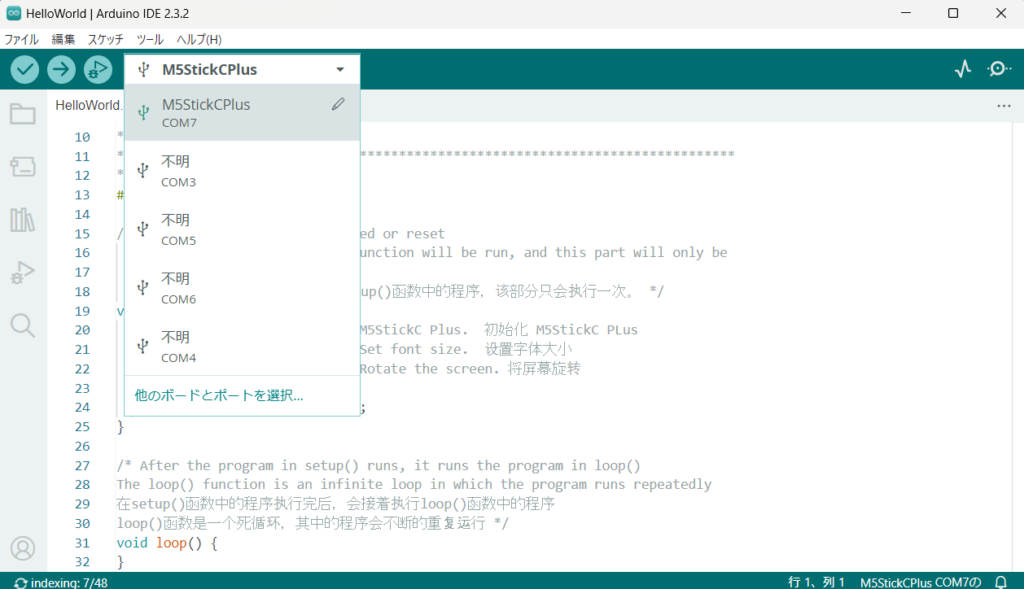
ツール → ボード → M5Stack → M5StickCPlus に設定する。

ファイル → スケッチ例 → M5StickCPlus → Basics → HelloWorld
上記のように進むと、サンプルコードを参照できる。
次に、M5StickCPlus 本体との USB 接続を確認する。
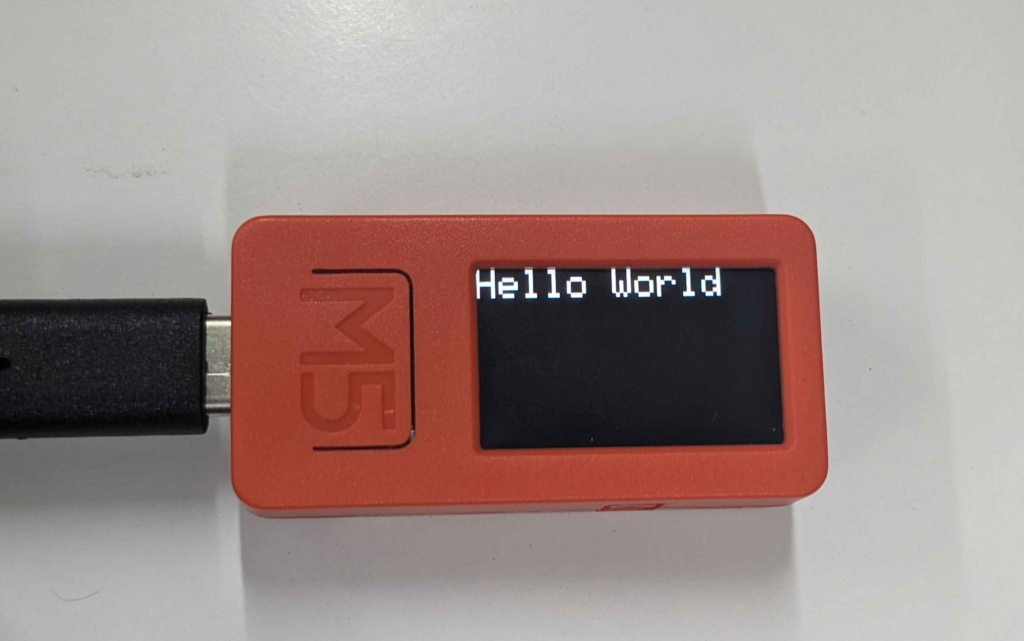
画面左上の「→」ボタンを押下してプログラムを本体に焼きこむ。
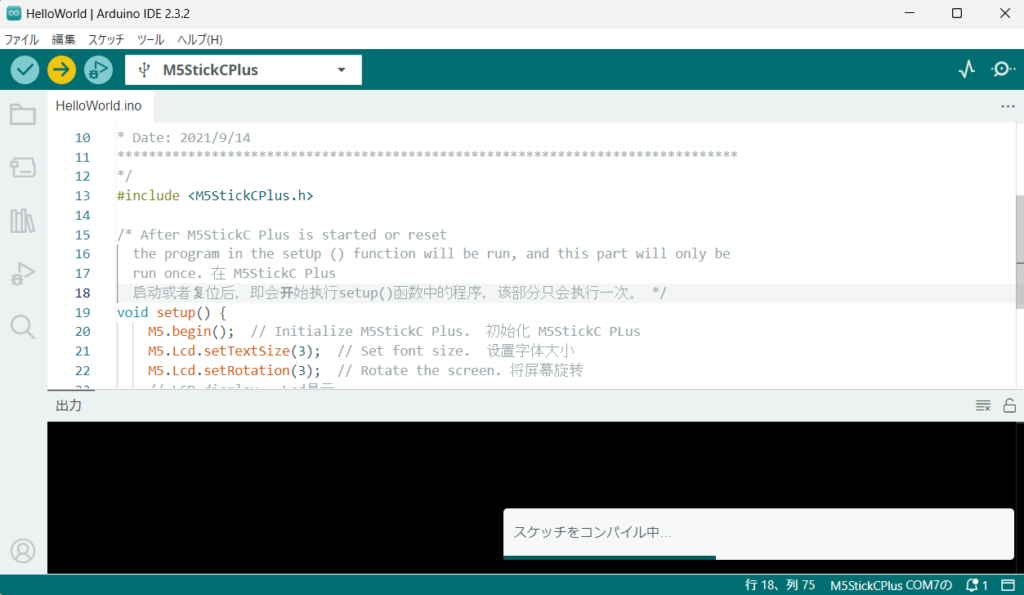
正常に実行されれば本体 LCD 上は画像の通りとなる。
これで Arduino IDE での開発準備が整った。
M5StickC Plus にプログラムを焼きこむ
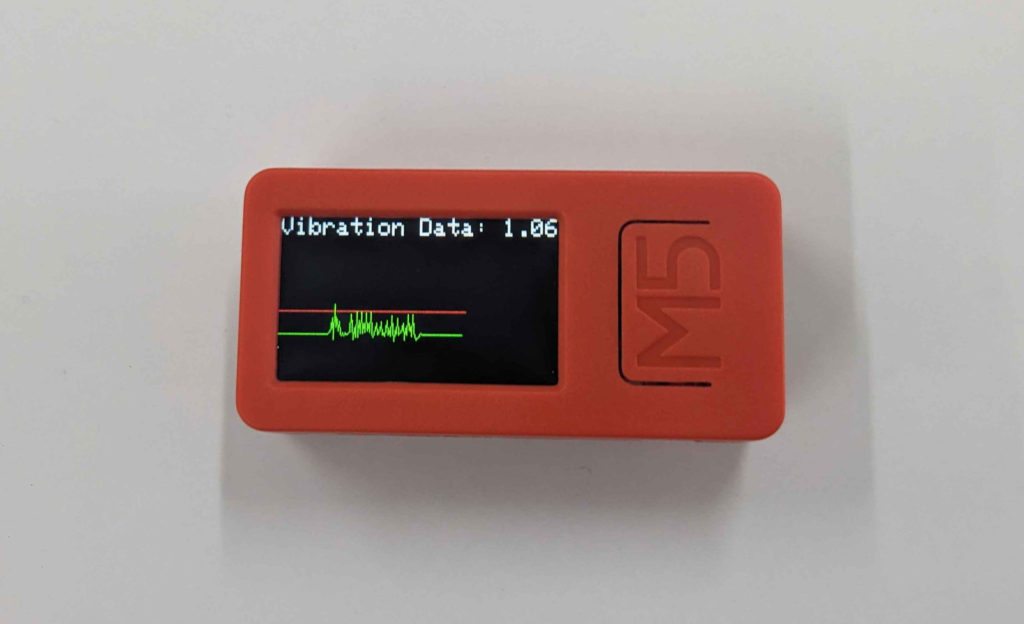
今回は、下記のようなシステムを構築した。
M5StickC Plus の LCD 上で振動データを数値表記とグラフ描画。Shifter.io を経由したMQTTの通信で、M5StickC Plus からの振動データを Node RED に送信・ダッシュボード表示。Node RED ダッシュボードから振動値のしきい値を設定し、M5StickC Plus にてアラート(ブザー)を設定。
システムフロー
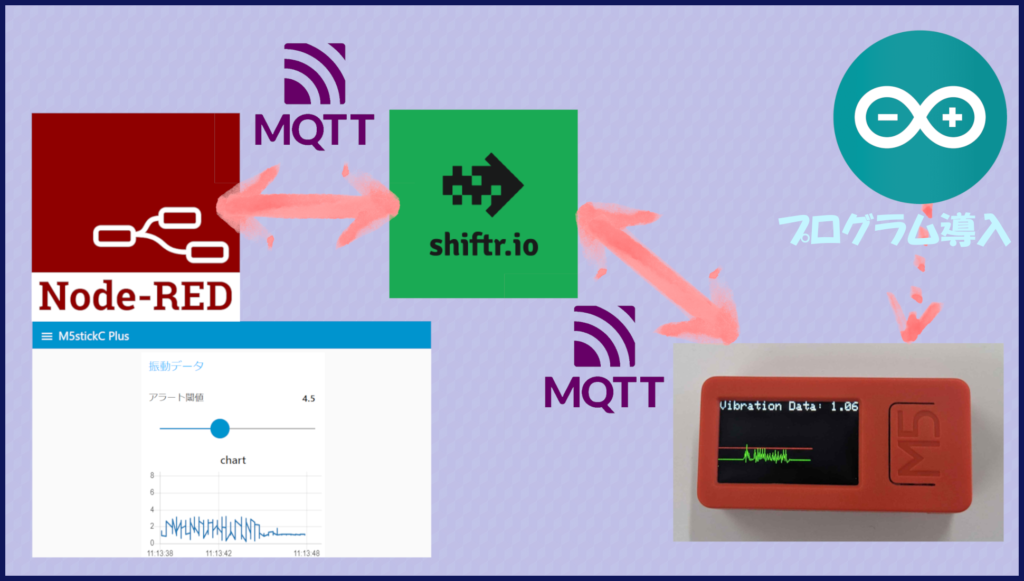
shifter.io をMQTT broker とし、NodeRED 側と M5StickC Plus 側で相互にデータを Subscribe, Publish しています。
プログラム
Arduino IDE から焼きこんだソースコードはこちら。
#include <M5StickCPlus.h>
#include <WiFi.h>
#include <PubSubClient.h>

#define GRAPH_HEIGHT 70
#define GRAPH_WIDTH 160
#define SAMPLE_RATE 10  // サンプリングレート (ミリ秒単位)
#define QOS 0

#define ADJUST 36  // グラフ全体を下にずらす幅を指定

float threshold = 3.0;   // しきい値

// WiFi
const char ssid[] = "WiFi-SSID";
const char passwd[] = "Wifi-Password";

// Pub/Sub
const char* mqttHost = "public.cloud.shiftr.io"; // MQTTのIPかホスト名
const int mqttPort = 1883;                       // MQTTのポート
const char* mqttUser = "public";                 // MQTTユーザー名
const char* mqttPass = "public";                 // MQTTパスワード
const char* topic = "magnitude";                 // 送信先のトピック名
const char* topic2 = "magnitude/set";            // 受信先のトピック名
char payload[10];                                // データ送信用の文字列バッファ

WiFiClient wifiClient;
PubSubClient mqttClient(wifiClient);

char data[50];

void setup() {
  Serial.begin(115200);

  M5.begin();
  M5.IMU.Init();
  M5.Lcd.setRotation(1);
  M5.Lcd.fillScreen(TFT_BLACK);
  M5.Lcd.setTextSize(2);
  M5.Lcd.setCursor(0, 0);

  mqttClient.setServer(mqttHost, mqttPort);
  mqttClient.setCallback(callback);

  // Connect WiFi
  connectWiFi();
  // Connect MQTT
  connectMqtt();
}

void loop() {

  if (mqttClient.connect(topic2)) {
    Serial.println("Connected.");
    mqttClient.subscribe(topic2, QOS);
    Serial.println("Subscribed.");
  }

  // 加速度データを取得
  float accX, accY, accZ;
  M5.IMU.getAccelData(&accX, &accY, &accZ);

  // 加速度の大きさを計算
  float magnitude = sqrt(accX * accX + accY * accY + accZ * accZ);

  // グラフに描画
  drawGraph(magnitude);
  sprintf(data, "Vibration Data: %.2f", magnitude);
  M5.Lcd.fillRect(0, 0, 160, 20, TFT_BLACK);  // x = 0, y = 0, 幅160px, 高さ20pxを黒で消去
  M5.Lcd.setCursor(0, 0);       // カーソル位置をリセット
  M5.Lcd.println(data);         // データを表示

  // しきい値を超えたらブザーを鳴らす
  if (magnitude > threshold) {
    M5.Beep.beep();
  } else {
    M5.Beep.mute(); // しきい値以下の場合はブザーを止める
  }

  // サンプリングレートに合わせて待機
  delay(SAMPLE_RATE);

  // 送信処理
  itoa(magnitude*100, payload, 10);
  if (mqttClient.publish(topic, payload)) {
    Serial.println("Message sent successfully");
  } else {
    Serial.println("Failed to send message");
  }

  delay(20);

  // WiFi 再接続処理
  if (WiFi.status() == WL_DISCONNECTED) {
    connectWiFi();
  }
  // MQTT 再接続処理
  if (!mqttClient.connected()) {
    connectMqtt();
  }
  mqttClient.loop();
}

void callback(char* topic2, byte* payload, unsigned int length) {
  Serial.print("Message arrived [");
  Serial.print(topic2);
  Serial.print("] ");

  // payloadを文字列として受け取り、floatに変換
  char message[length + 1];  // 受信データを格納するバッファ
  for (int i = 0; i < length; i++) {
    message[i] = (char)payload[i];  // バイトデータを文字に変換
  }
  message[length] = '\0';  // Null終端を追加

  Serial.println(message);  // メッセージをシリアルモニタに出力

  // 受信したデータをfloat型に変換してしきい値として使用
  float receivedThreshold = atof(message);  // 文字列をfloatに変換
  if (receivedThreshold > 0) {  // 有効な数値であるか確認
    threshold = receivedThreshold;  // 新しいしきい値を設定
    Serial.print("New threshold set: ");
    Serial.println(threshold);
  }
}


void drawGraph(float value) {
  static int16_t lastX = 0;
  static int16_t lastY = GRAPH_HEIGHT + ADJUST;  // グラフのY位置を下にずらす
  int16_t x = lastX + 1;
  int16_t y = GRAPH_HEIGHT + ADJUST - (value * 10);  // 値に基づいて高さを調整しつつ、Y座標を下にずらす

  if (y < ADJUST) y = ADJUST;  // Y座標の最小値をADJUSTに制限

  // xが画面幅を超えたらリセット
  if (x >= GRAPH_WIDTH) {
    x = 0;
    lastX = 0;

    // グラフの描画領域を消去、Y座標をADJUSTに基づいて調整
    M5.Lcd.fillRect(0, ADJUST - 2, GRAPH_WIDTH + 2, GRAPH_HEIGHT + 2, TFT_BLACK);  // 幅を少し広げて完全に消去

    // しきい値のリファレンスラインを再描画
    int16_t threshold_y = GRAPH_HEIGHT + ADJUST - (threshold * 10);
    if (threshold_y < ADJUST) threshold_y = ADJUST;  // リファレンスラインの最小値もADJUSTに制限
    if (threshold_y > GRAPH_HEIGHT + ADJUST) threshold_y = GRAPH_HEIGHT + ADJUST;  // グラフの高さを超えないようにする
    M5.Lcd.drawLine(0, threshold_y, GRAPH_WIDTH, threshold_y, TFT_RED);  // リファレンスラインを描画
  }

  // グラフの線を描画
  M5.Lcd.drawLine(lastX, lastY, x, y, TFT_GREEN);

  lastX = x;
  lastY = y;
}


void connectWiFi() {
  WiFi.begin(ssid, passwd);
  Serial.print("WiFi connecting...");
  while (WiFi.status() != WL_CONNECTED) {
    Serial.print(".");
    delay(100);
  }
  Serial.print(" connected. ");
  Serial.println(WiFi.localIP());
}

void connectMqtt() {
  mqttClient.setServer(mqttHost, mqttPort);
  while (!mqttClient.connected()) {
    Serial.println("Connecting to MQTT...");
    String clientId = "ESP32-" + String(random(0xffff), HEX);
    if (mqttClient.connect(clientId.c_str(), mqttUser, mqttPass)) {
      Serial.println("connected");
    } else {
      Serial.print("failed, rc=");
      Serial.print(mqttClient.state());
      delay(1000);
    }
    randomSeed(micros());
  }
}
NodeRED で フローを作成する
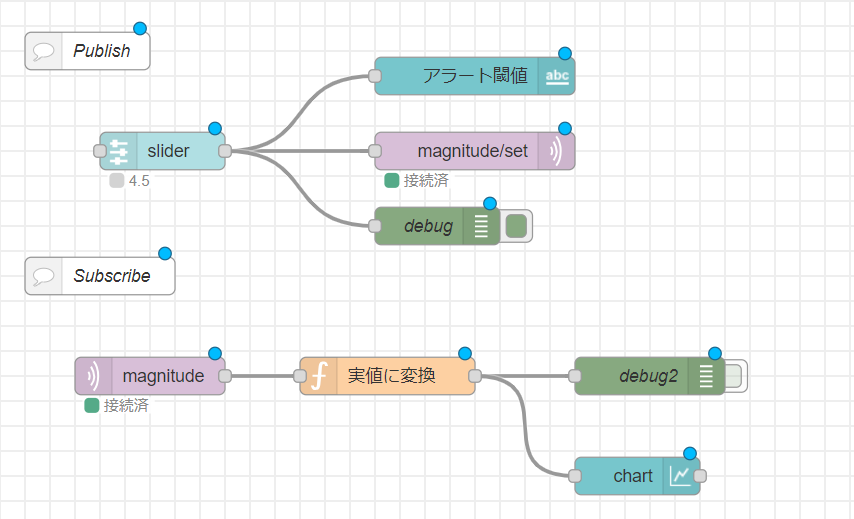
構造
M5stickC Plus 側で動作しているプログラムで指定したMQTT topic を参照し、
受信したデータをダッシュボード上に反映しています。
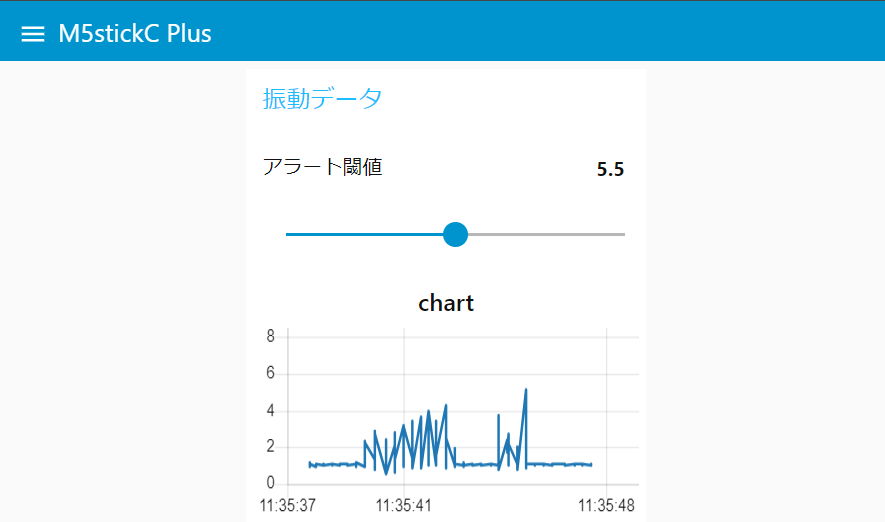
ダッシュボード上からブザーを動作させる閾値を動的に設定することができます。
フローデータ
[ { "id": "bc7df8ac4cfff027", "type": "tab", "label": "M5stickC Plus", "disabled": false, "info": "", "env": [] }, { "id": "73e1e56cc065beaa", "type": "mqtt in", "z": "bc7df8ac4cfff027", "name": "", "topic": "magnitude", "qos": "2", "datatype": "auto-detect", "broker": "e457312231d1a0fb", "nl": false, "rap": true, "rh": 0, "inputs": 0, "x": 180, "y": 340, "wires": [ [ "ee58680bb52f7d4c" ] ] }, { "id": "03f8b44f7b76fad9", "type": "debug", "z": "bc7df8ac4cfff027", "name": "debug2", "active": false, "tosidebar": true, "console": false, "tostatus": false, "complete": "payload", "targetType": "msg", "statusVal": "", "statusType": "auto", "x": 580, "y": 340, "wires": [] }, { "id": "ee58680bb52f7d4c", "type": "function", "z": "bc7df8ac4cfff027", "name": "実値に変換", "func": "msg.payload = msg.payload / 100;\nreturn msg;", "outputs": 1, "timeout": 0, "noerr": 0, "initialize": "", "finalize": "", "libs": [], "x": 370, "y": 340, "wires": [ [ "03f8b44f7b76fad9", "619e4c1d42ec9d99" ] ] }, { "id": "619e4c1d42ec9d99", "type": "ui_chart", "z": "bc7df8ac4cfff027", "name": "", "group": "6cd13d1562799dab", "order": 3, "width": "6", "height": "4", "label": "chart", "chartType": "line", "legend": "false", "xformat": "HH:mm:ss", "interpolate": "linear", "nodata": "", "dot": false, "ymin": "0", "ymax": "8", "removeOlder": "10", "removeOlderPoints": "", "removeOlderUnit": "1", "cutout": 0, "useOneColor": false, "useUTC": false, "colors": [ "#1f77b4", "#aec7e8", "#ff7f0e", "#2ca02c", "#98df8a", "#d62728", "#ff9896", "#9467bd", "#c5b0d5" ], "outputs": 1, "useDifferentColor": false, "className": "", "x": 570, "y": 420, "wires": [ [] ] }, { "id": "51fcc297686d52e9", "type": "mqtt out", "z": "bc7df8ac4cfff027", "name": "", "topic": "magnitude/set", "qos": "", "retain": "", "respTopic": "", "contentType": "", "userProps": "", "correl": "", "expiry": "", "broker": "e457312231d1a0fb", "x": 440, "y": 160, "wires": [] }, { "id": "3aba0cba745b199c", "type": "ui_slider", "z": "bc7df8ac4cfff027", "name": "", "label": "", "tooltip": "", "group": "6cd13d1562799dab", "order": 2, "width": 0, "height": 0, "passthru": true, "outs": "all", "topic": "topic", "topicType": "msg", "min": "1", "max": 10, "step": "0.5", "className": "", "x": 190, "y": 160, "wires": [ [ "51fcc297686d52e9", "ea37116504ef763f", "2cf13a4ece51d1af" ] ] }, { "id": "ea37116504ef763f", "type": "ui_text", "z": "bc7df8ac4cfff027", "group": "6cd13d1562799dab", "order": 1, "width": 0, "height": 0, "name": "", "label": "アラート閾値", "format": "{{msg.payload}}", "layout": "row-spread", "className": "", "style": false, "font": "", "fontSize": 16, "color": "#000000", "x": 440, "y": 100, "wires": [] }, { "id": "2cf13a4ece51d1af", "type": "debug", "z": "bc7df8ac4cfff027", "name": "debug", "active": true, "tosidebar": true, "console": false, "tostatus": false, "complete": "payload", "targetType": "msg", "statusVal": "", "statusType": "auto", "x": 410, "y": 220, "wires": [] }, { "id": "4d5f0cc9420e6099", "type": "comment", "z": "bc7df8ac4cfff027", "name": "Publish", "info": "", "x": 130, "y": 80, "wires": [] }, { "id": "9934a86ec605419c", "type": "comment", "z": "bc7df8ac4cfff027", "name": "Subscribe", "info": "", "x": 140, "y": 260, "wires": [] }, { "id": "e457312231d1a0fb", "type": "mqtt-broker", "name": "", "broker": "mqtt://public:public@public.cloud.shiftr.io", "port": "1883", "clientid": "", "autoConnect": true, "usetls": false, "protocolVersion": "4", "keepalive": "60", "cleansession": true, "autoUnsubscribe": true, "birthTopic": "", "birthQos": "0", "birthRetain": "false", "birthPayload": "", "birthMsg": {}, "closeTopic": "", "closeQos": "0", "closeRetain": "false", "closePayload": "", "closeMsg": {}, "willTopic": "", "willQos": "0", "willRetain": "false", "willPayload": "", "willMsg": {}, "userProps": "", "sessionExpiry": "" }, { "id": "6cd13d1562799dab", "type": "ui_group", "name": "振動データ", "tab": "397a691287ac3b99", "order": 6, "disp": true, "width": "6", "collapse": false, "className": "" }, { "id": "397a691287ac3b99", "type": "ui_tab", "name": "M5stickC Plus", "icon": "dashboard", "disabled": false, "hidden": false } ]