前回はLoRaWANゲートウェイMS48-LRからクラウドにあるTheThingsNetworkへ、LoRaWAN温湿度センサーEM-ELHT01のデータを送る方法を検証しました。
今回は ゲートウェイMS48-LRをLocalHost/Built-in Serverとしてローカルだけで使う場合の設定方法を検証します。
LoRaWAN Configuration
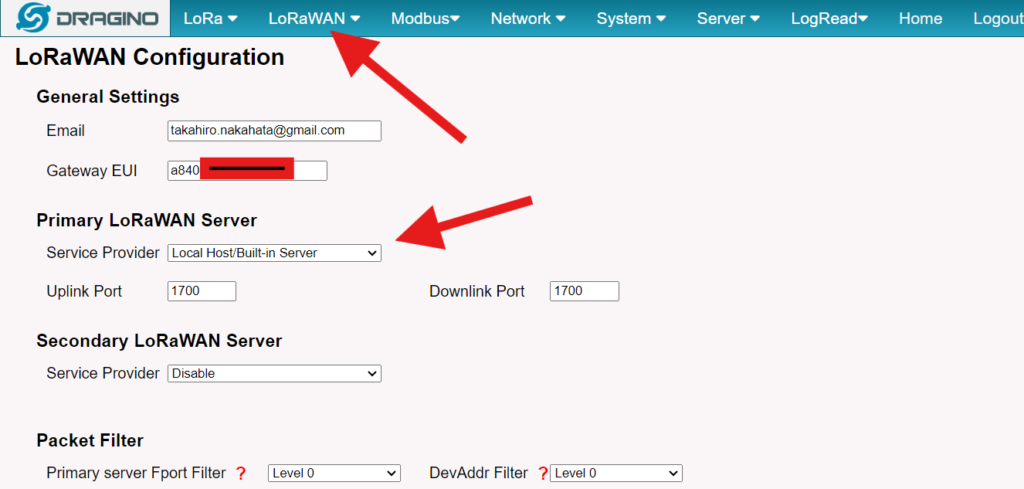
Localで使用する場合は、PrimaryLoRaWAN ServerのService ProviderをLocalHost/Built-in Serverにします。ここだけ変更してSave&Apply。
Built-In Network Serverの設定
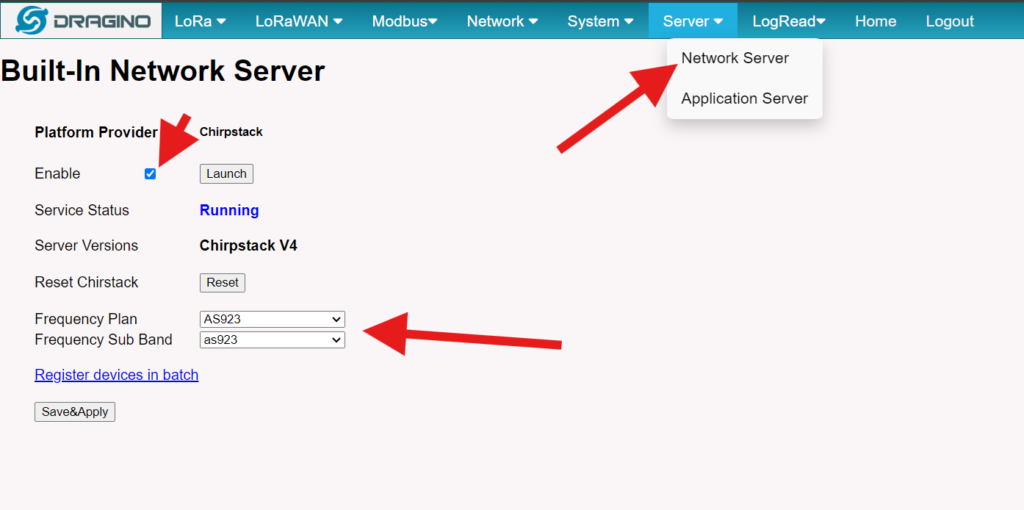
タブからNetwork Serverを選択。Enableにチェックをいれ、FrequencyPlanをAS923にして、Save&Apply。
LaunchをクリックするとChirpStackのlogin画面になります。
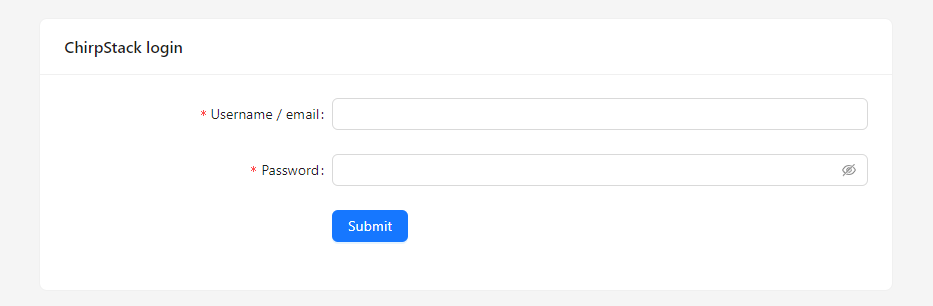
デフォルトは admin/admin でログインします。
ChirpStackの設定
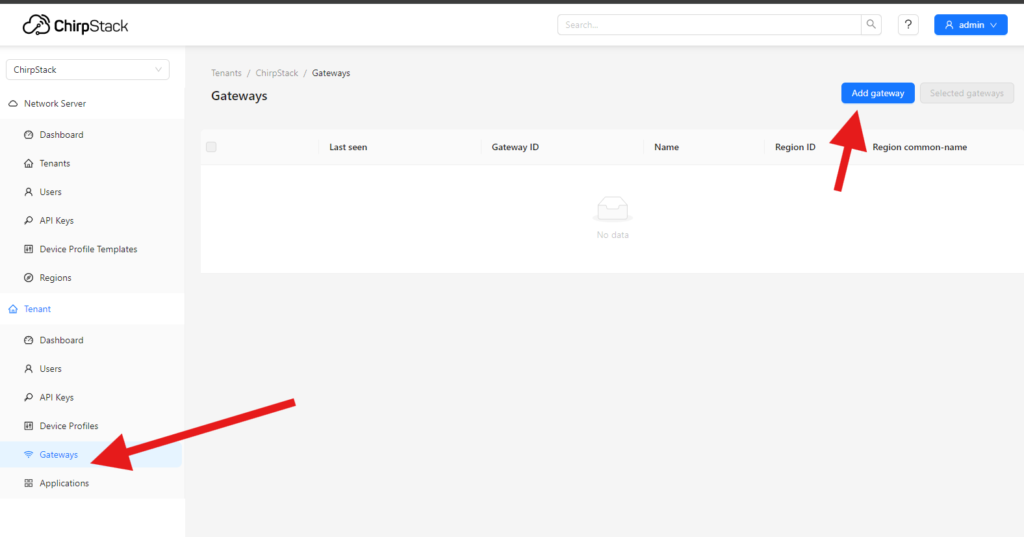
左側のTenantからGatewayをクリック。右上のAdd gatewayでゲートウェイを追加します。
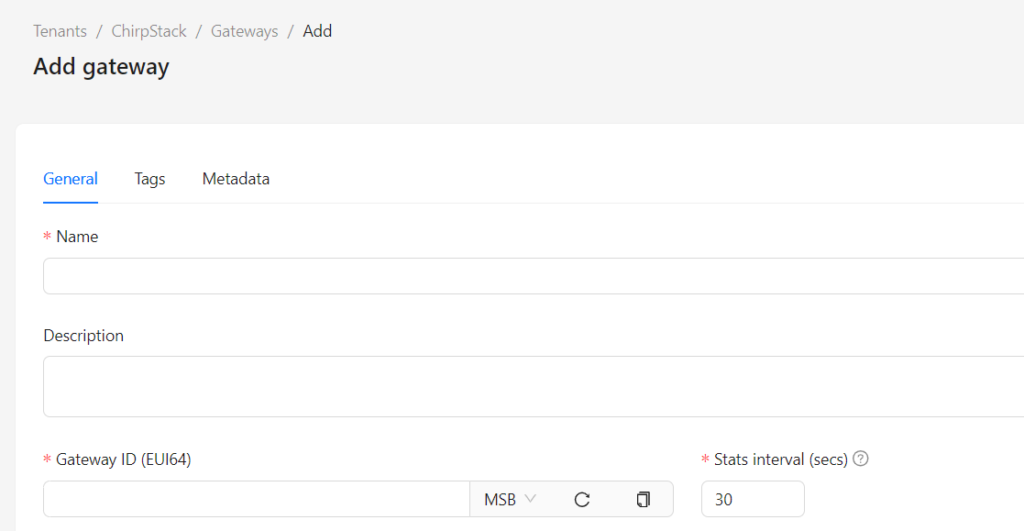
Nameを適当につけて、Gateway ID(LoRaWAN Configurationで表示)を入力します。
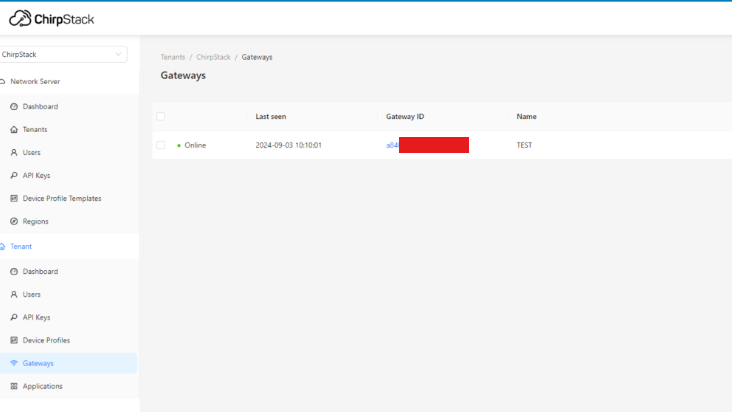
無事に登録されました。
Device Profileの登録

受け取ったLoRaWANセンサーデータの種類やデコードなどは、DeviceProfileで登録します。
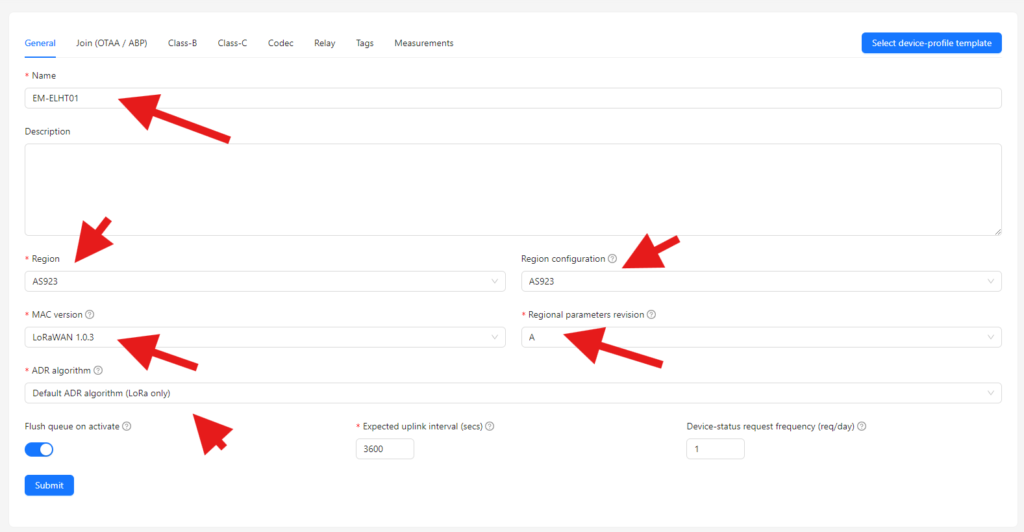
EM-ELHT01のセンサーのプロファイルのGeneralを登録します。
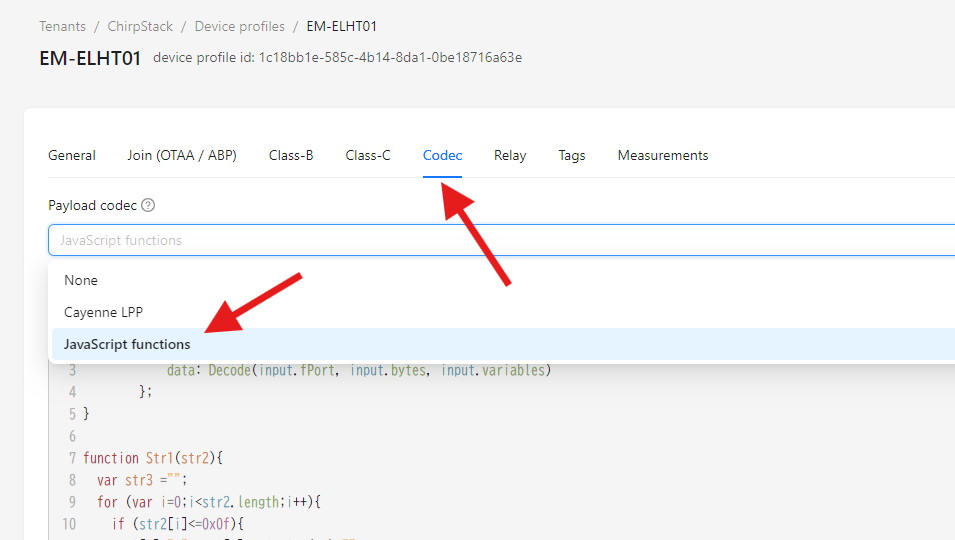
Codecのタブを選び、Payload codecをJavaScript functionを選択。
JavaScriptのコードについて、Dragino社はgithubで公開しています。
https://github.com/dragino/dragino-end-node-decoder
EM-ELHT01のスクリプトは
https://github.com/dragino/dragino-end-node-decoder/tree/main/LHT65N
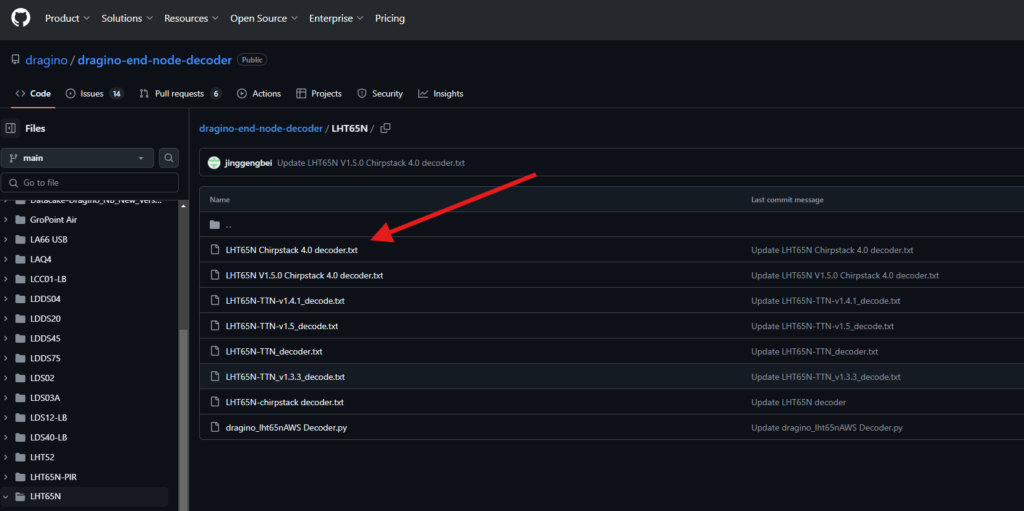
ここのLHT65N Chirpstack 4.0 decoder.txtを選びます
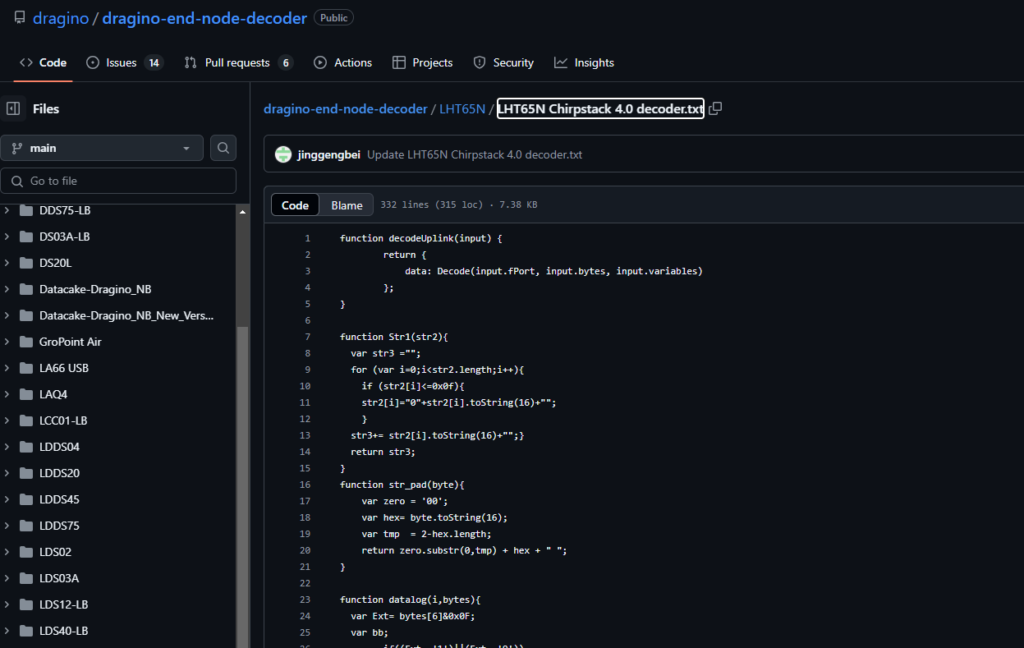
スクリプトをコピーして貼り付け
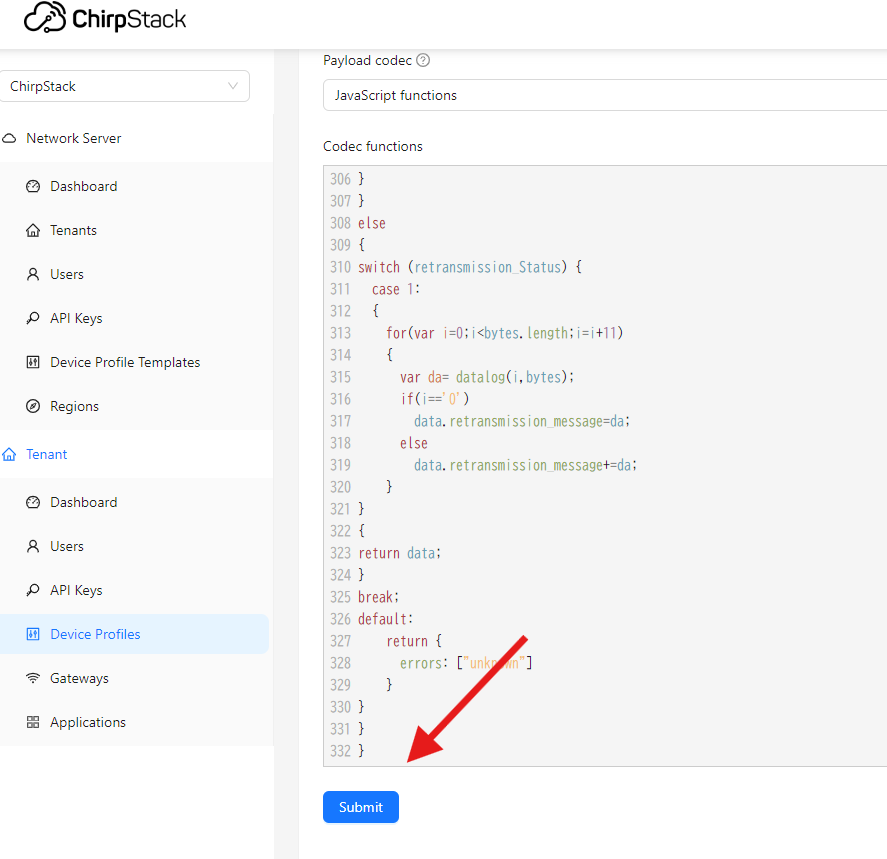
一番下にあるSubmitをクリック
これでDeviceProfileの登録は完了。別のセンサーを使用する場合は、そのデバイスのProfileも登録する必要があります。
アプリケーションの登録
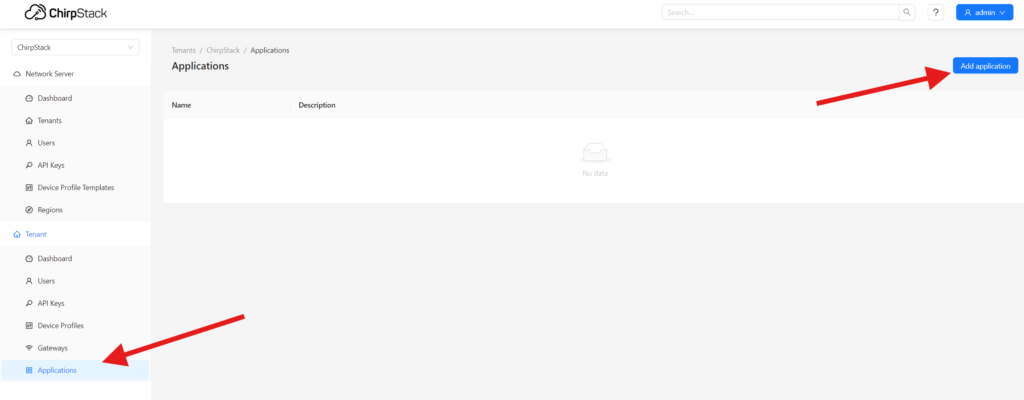
左側のTenantタブからApplicationsを選択。右上のAdd applicationを押します。

温湿度テストというアプリケーションを追加します。
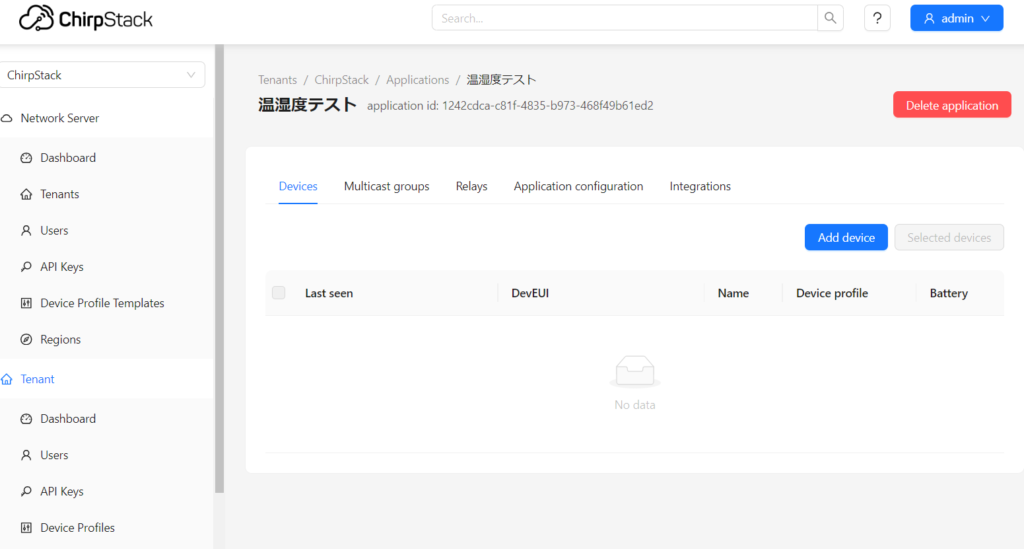
作成された温湿度テストというアプリケーションを選択し、Add deviceをクリック。これで実際に使用する温湿度センサーの情報を入力します。
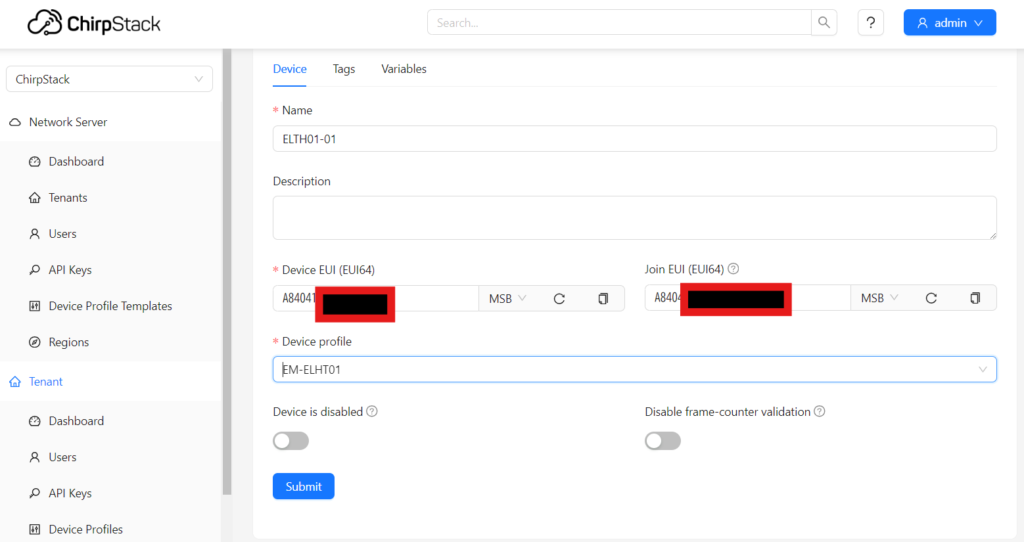
入力するのは、Device EUI、Join EUIとこの後の画面でてくるAPP KEYの3種類です。
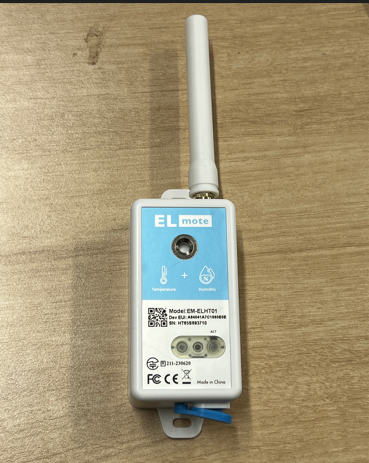
これらの情報は製品の箱に記載されています。製品自体には記載されていないので注意してください。ただ、センサーに専用のケーブルで接続することでここらへんのデータはとれるとのことです。
また、センサーを多く使う場合はCSVデータでの提供もあるとのことです。
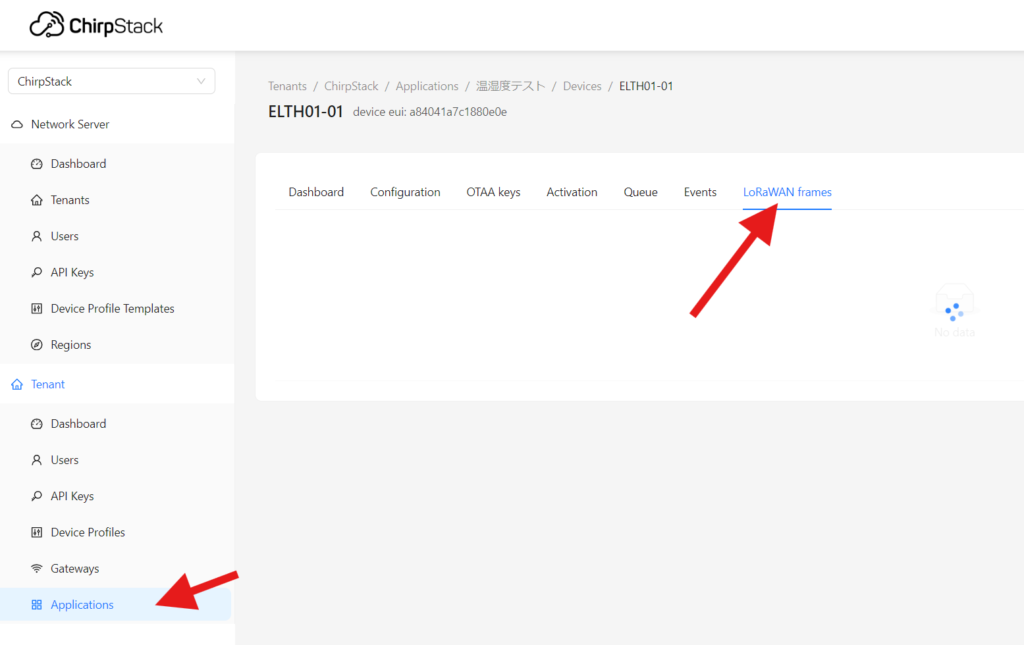
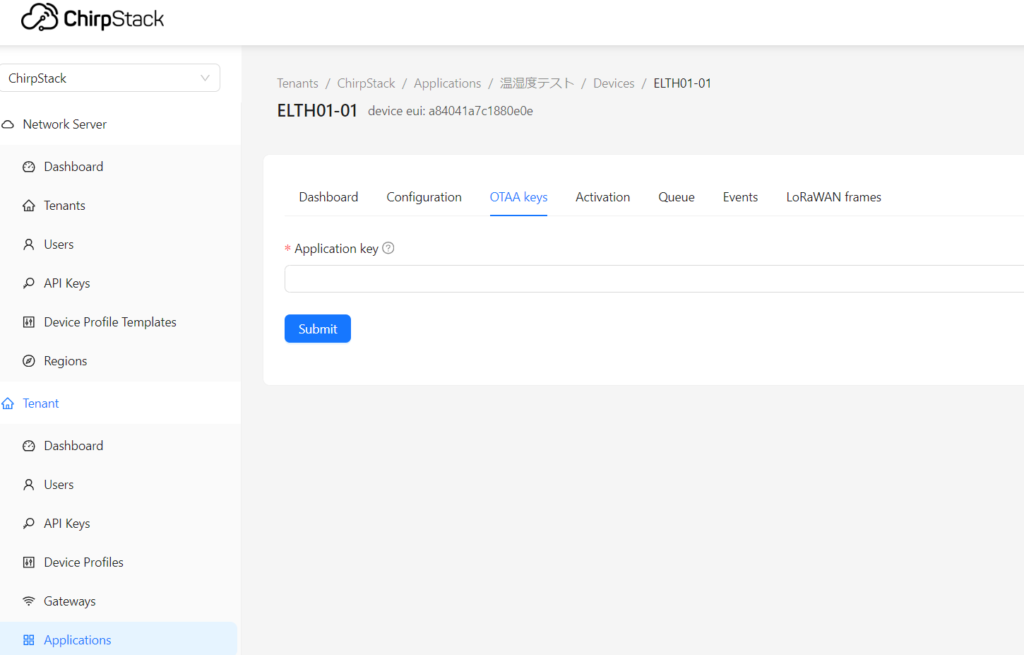
登録できたら、デバイス画面のLoRaWAN framesのタブを開いた状態で、センサのACTボタンを長押しします。
ACTというボタンを5秒間長押しすると、LEDが点滅。
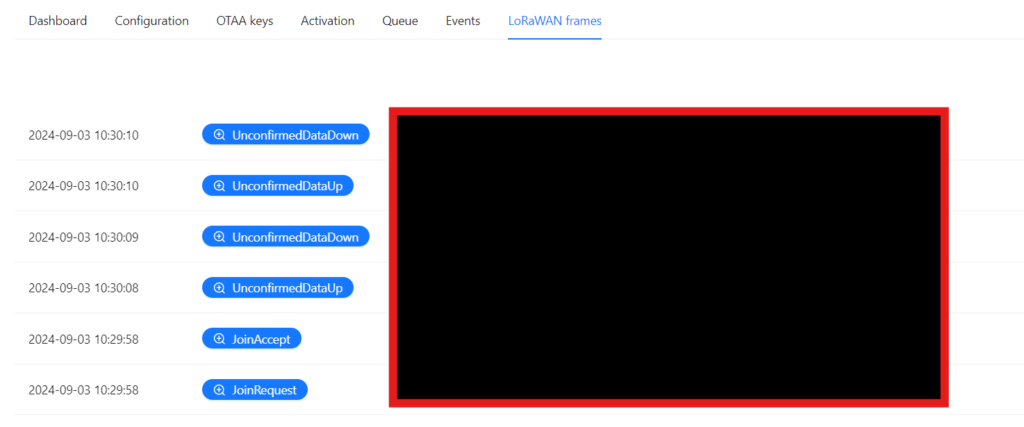
このようにデータがやりとりする様子を確認できました。
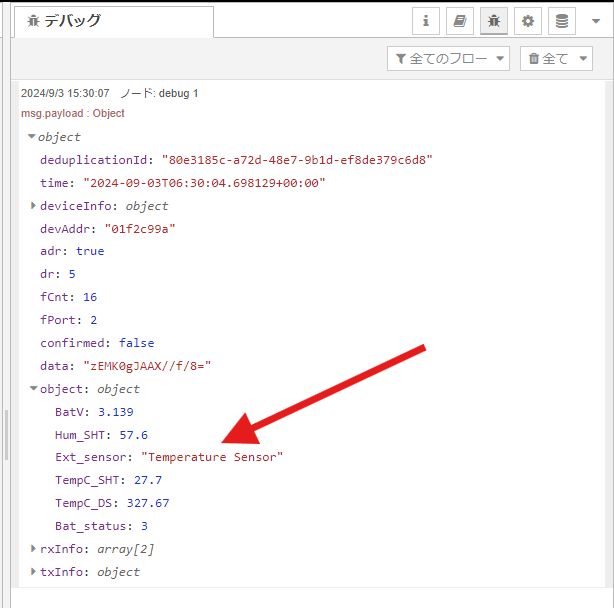
次に受信したデータがちゃんとCodecでデコードされているか確認します。
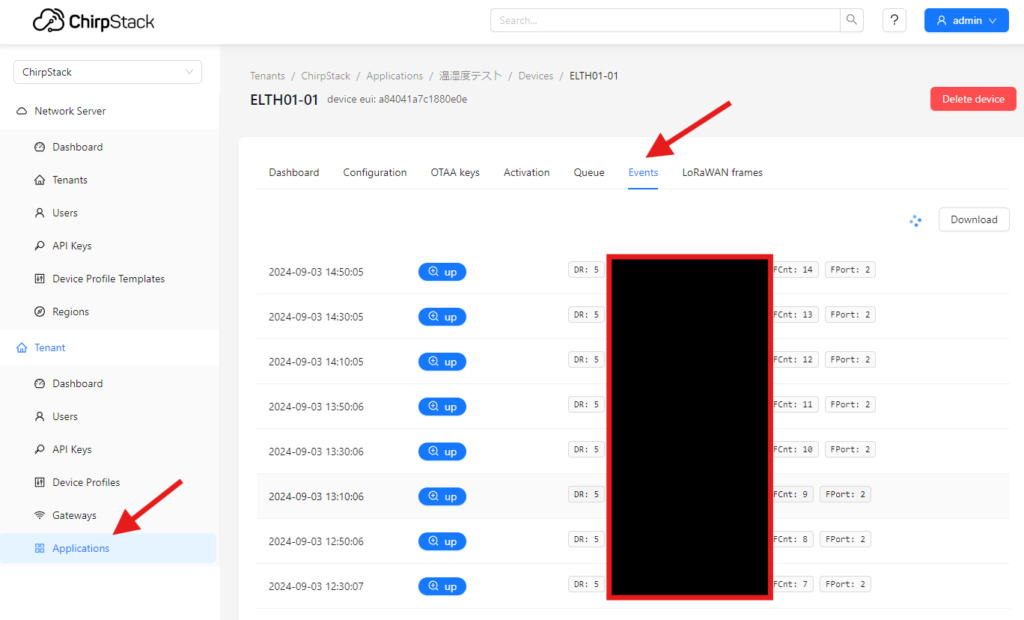
EventsのタブをクリックしてUPというボタンを押します。
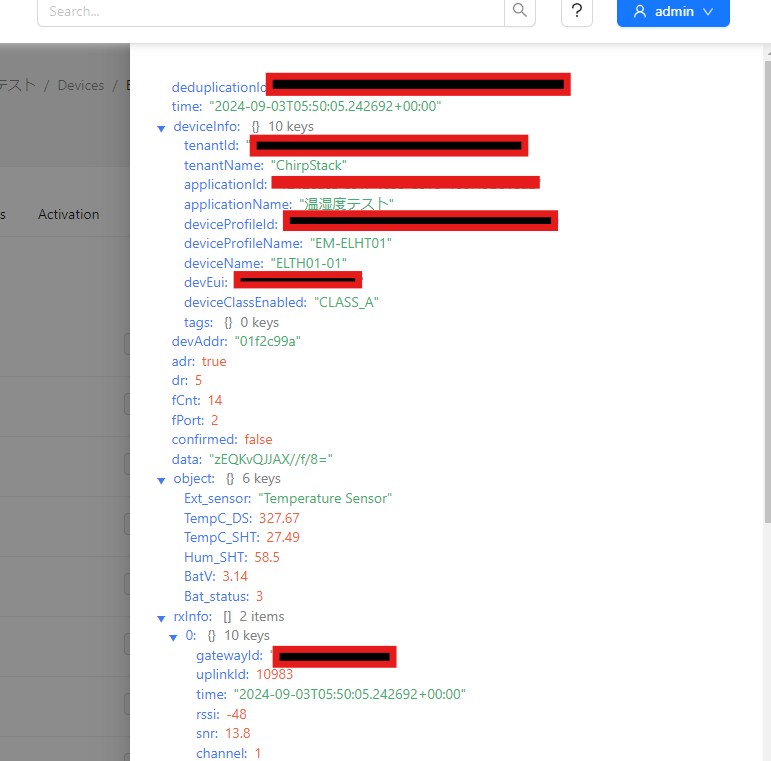
Objectの中に、TempC_SHT、Hu_SHTという値が確認でき、無事にデータが受信できました。
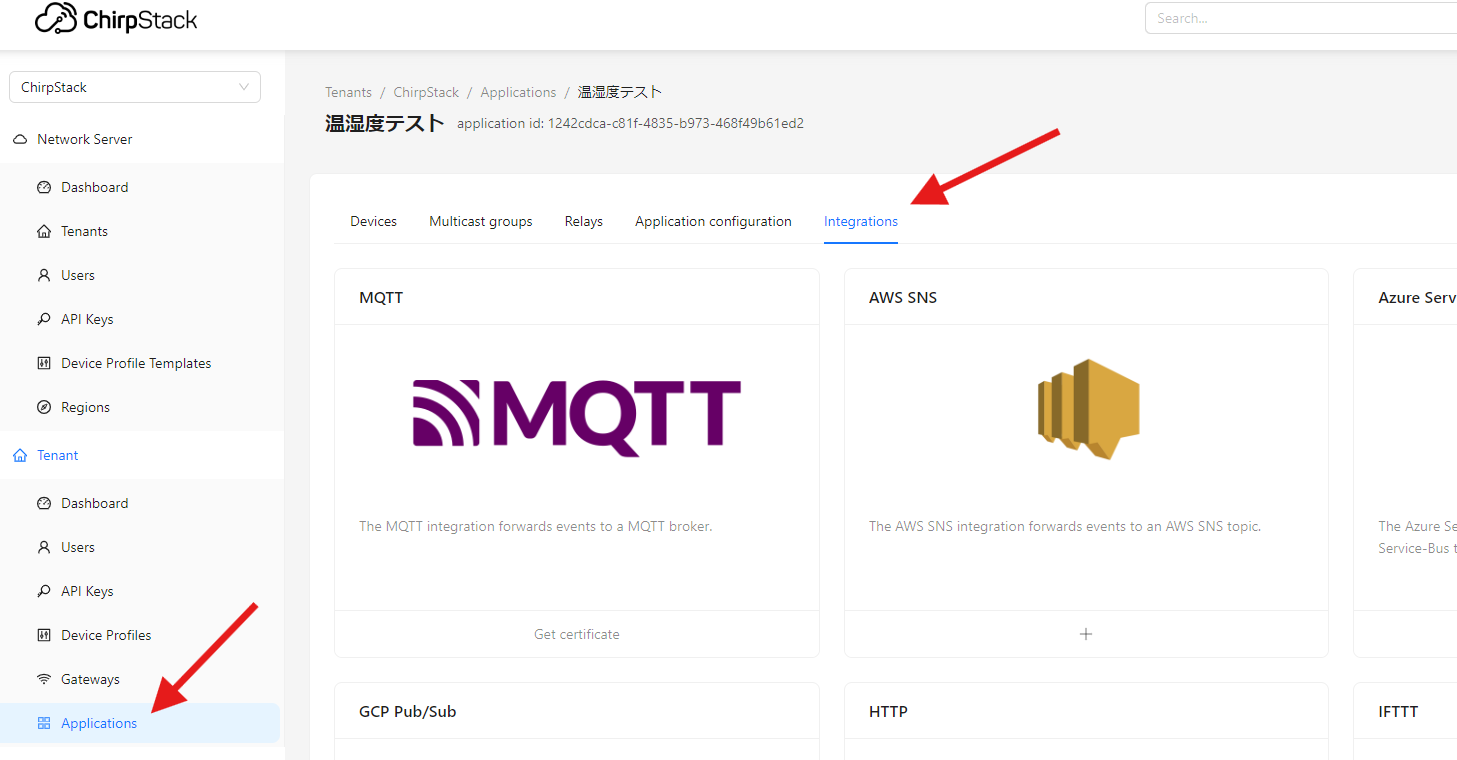
Integration

ApplicationsからIntegrationのタブをクリックすると、他のシステムにどのようにデータを送るかを選べます。
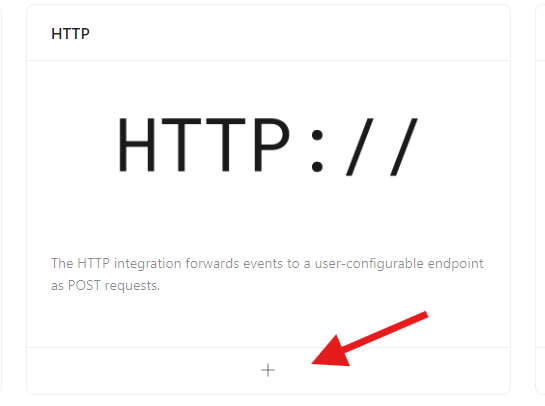
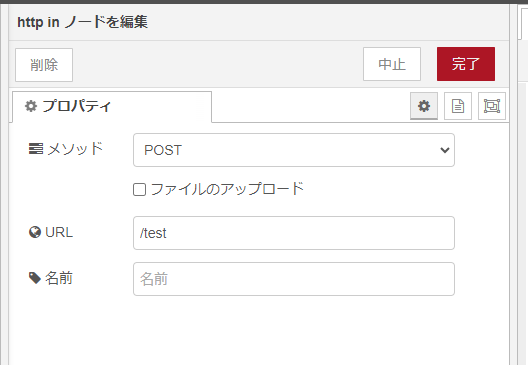
まずはHTTPでやってみます。+マークをクリック
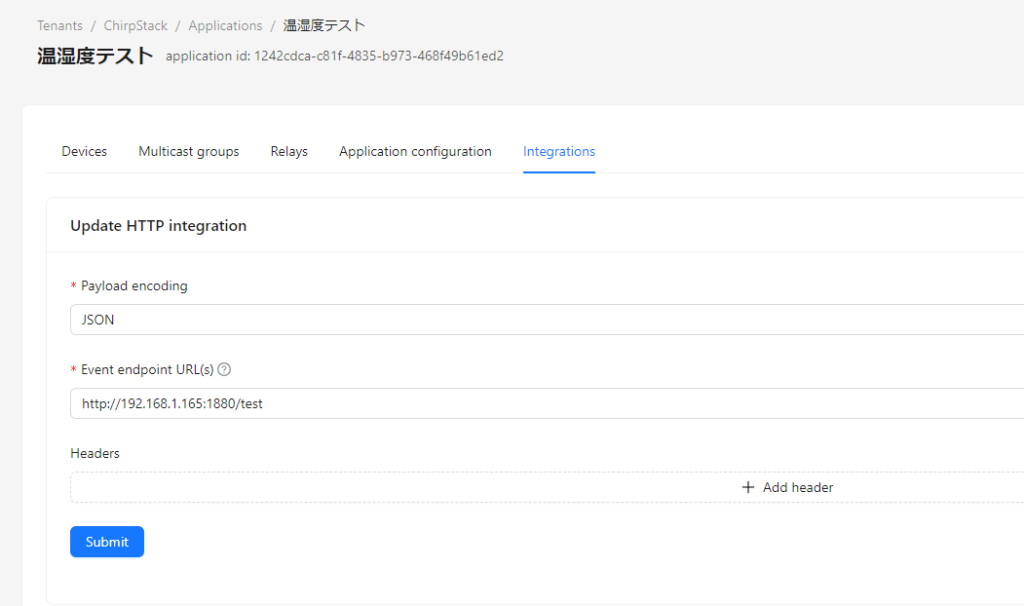
ゲートウェイ内のNode-REDで受信できるか実験してみます。EndpointのURLは上記のように設定。
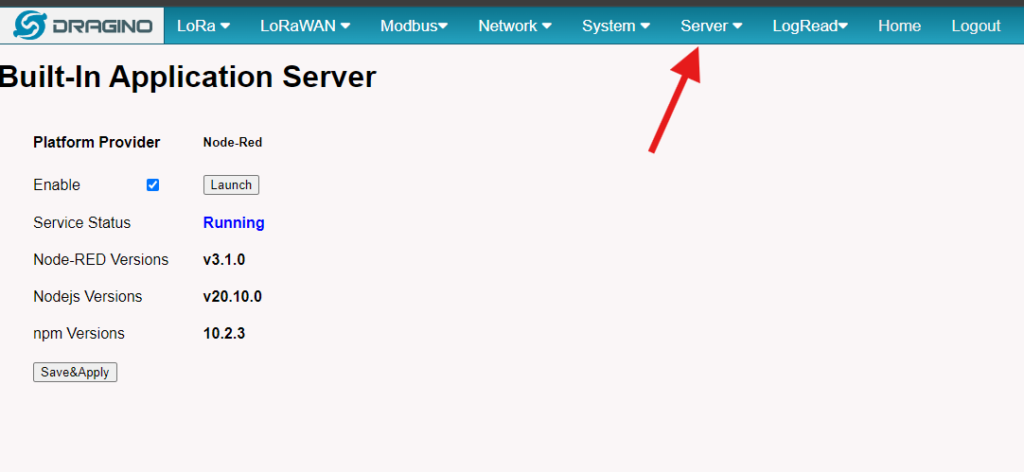
ServerからApplicationServerを開くとNode-REDがあるので、開きます。
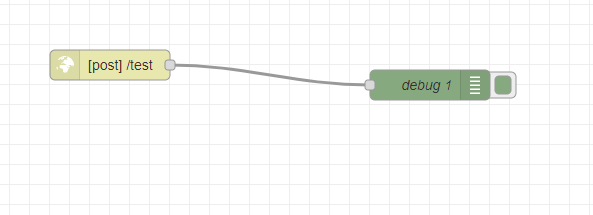
フローは単純にHTTP INノードとdebugノードをつなぎます。
このようにします。
無事にゲートウェイに内蔵されたNode-REDでセンサーデータを受信することができました。
まとめ
以上、エルスピーナヴェインズの青谷さんにサポートいただきながら、目的とするLoRaWANセンサーからゲートウェイにデータを受信し、Node-REDにそのデータを送ることに成功しました。
ちなみにこのゲートウェイMS48-LRはModbusでデータを送信することもできるので、今後はその方法についても検証していきたいと思います。