P2Pで映像をストリーミングする方法を勉強するには、WebRTC (Web Real-Time Communication) が最適です。WebRTCは、ブラウザやアプリ間でP2P接続を利用してリアルタイムで音声や映像をやり取りできる技術です。以下に、自分のPCで試せる方法をステップバイステップで説明します。
開発環境の準備
VisualStudio CodeやNode.jsをインストールしてください。
簡単なWebRTCアプリを作成する
プロジェクトをセットアップ

シグナリングサーバーを作成
server.js
const express = require("express");
const http = require("http");
const { Server } = require("socket.io");

const app = express();
const server = http.createServer(app);
const io = new Server(server);

app.use(express.static("public"));

io.on("connection", (socket) => {
  console.log("A user connected");

  socket.on("signal", (data) => {
    socket.broadcast.emit("signal", data);
  });

  socket.on("disconnect", () => {
    console.log("A user disconnected");
  });
});

server.listen(3000, () => {
  console.log("Server is running on http://localhost:3000");
});
フロントエンドを作成
public/index.html
<!DOCTYPE html>
<html lang="en">
<head>
  <meta charset="UTF-8">
  <meta name="viewport" content="width=device-width, initial-scale=1.0">
  <title>WebRTC P2P Streaming</title>
</head>
<body>
  <h1>WebRTC P2P Streaming</h1>
  <video id="localVideo" autoplay muted></video>
  <video id="remoteVideo" autoplay></video>
  <script src="/socket.io/socket.io.js"></script>
  <script>
    const localVideo = document.getElementById("localVideo");
    const remoteVideo = document.getElementById("remoteVideo");
    const socket = io();

    const peerConnection = new RTCPeerConnection();

    // シグナリングメッセージを交換
    socket.on("signal", async (data) => {
      if (data.offer) {
        await peerConnection.setRemoteDescription(new RTCSessionDescription(data.offer));
        const answer = await peerConnection.createAnswer();
        await peerConnection.setLocalDescription(answer);
        socket.emit("signal", { answer });
      } else if (data.answer) {
        await peerConnection.setRemoteDescription(new RTCSessionDescription(data.answer));
      } else if (data.candidate) {
        await peerConnection.addIceCandidate(new RTCIceCandidate(data.candidate));
      }
    });

    peerConnection.onicecandidate = (event) => {
      if (event.candidate) {
        socket.emit("signal", { candidate: event.candidate });
      }
    };

    peerConnection.ontrack = (event) => {
      remoteVideo.srcObject = event.streams[0];
    };

    navigator.mediaDevices.getUserMedia({ video: true, audio: false }).then((stream) => {
      localVideo.srcObject = stream;
      stream.getTracks().forEach((track) => peerConnection.addTrack(track, stream));
    });

    // オファーの作成と送信
    (async () => {
      const offer = await peerConnection.createOffer();
      await peerConnection.setLocalDescription(offer);
      socket.emit("signal", { offer });
    })();
  </script>
</body>
</html>

ファイルなどの階層はこのようになります。
実行

ターミナルでserver.jsを実行します。

ブラウザで http://localhost:3000 にアクセスすると、上記のように表示されます。
ただし、このPCのIPアドレスが192.168.1.54だったときに、別のPCから
http://192.168.1.54:3000 とブラウザを開いても

このように、getUserMediaでエラーが発生します。
HTTPSが必要
WebRTCは、一部のブラウザ(特にGoogle Chrome)でHTTPSが必須となっています。ローカル環境ではHTTPで動作しますが、別のPCからアクセスする場合にはHTTPSにする必要があります。
OpenSSLを使ってHTTPSのための証明書を作成するのですが、WindowsではChocolateyを使ってOpenSSLをインストールする必要があります。
自己署名証明書を生成
openssl genrsa -out key.pem 2048
openssl req -new -key key.pem -out cert.csr
openssl x509 -req -in cert.csr -signkey key.pem -out cert.pem
上記コマンドを実行して生成されるkey.pem と cert.pemをプロジェクトフォルダに移動します。
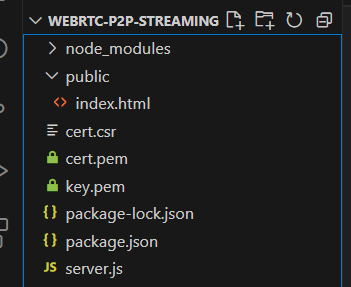
こんな感じ。
server.jsをSSL化
const express = require("express");
const https = require("https"); // https モジュールを使用
const fs = require("fs");
const { Server } = require("socket.io");

const app = express();

// SSL証明書と秘密鍵の読み込み
const options = {
  key: fs.readFileSync("key.pem"), // 秘密鍵
  cert: fs.readFileSync("cert.pem"), // SSL証明書
};

// HTTPSサーバーを作成
const server = https.createServer(options, app);

// Socket.IOのサーバーをHTTPS上に作成
const io = new Server(server);

app.use(express.static("public")); // public フォルダ内の静的ファイルをホスティング

io.on("connection", (socket) => {
  console.log("A user connected");

  socket.on("signal", (data) => {
    socket.broadcast.emit("signal", data);
  });

  socket.on("disconnect", () => {
    console.log("A user disconnected");
  });
});

// HTTPSサーバーを起動
server.listen(3000, () => {
  console.log("Secure server is running on https://localhost:3000");
});
このように修正して node server.jで実行
別のPCから https://192.168.1.54:3000 を開くと

と、表示されたのですが、カメラの映像が開いた側のPCのカメラの映像になっていました。
本当は、server.jsを動かしている192.168.1.54のPCのカメラの映像を、別のPCでhttps://192.168.1.54:3000を開くと表示されるようにしたかったのですが、このプログラムはそうではないようです。
server.jsを動かしているPCのカメラの映像を他のPCで表示させる方法
サーバーPCのカメラ映像を他のPCで表示するには、WebRTCを構築します。WebRTCを使用して映像データを他のクライアントに配信する場合、特に「ストリームを送信する側」と「受信する側」の役割分担を意識することが重要です。
ということなので、この方法については後日検証したいとおもう。