前回、KNX視覚化サーバーbOSのAPI機能をつかって外部からデバイスを操作するという記事で、Node-REDからhttp requestノードでKNXデバイスの操作をする方法を紹介しました。
今回は、KNXデバイスの情報をNode-REDから取得する機能について紹介します。
Node-REDフロー

フローはこちらの通りです。
[{"id":"1d8be5d180cf4986","type":"http request","z":"de16c5a1c842773b","name":"","method":"POST","ret":"txt","paytoqs":"ignore","url":"http://RPC:RPC@192.168.1.14/API/RPC/GetValue","tls":"","persist":false,"proxy":"","authType":"","senderr":false,"x":510,"y":620,"wires":[["daa4f233cd15bd45"]]},{"id":"7403291b3c84f273","type":"template","z":"de16c5a1c842773b","name":"LAMP","field":"payload","fieldType":"msg","format":"handlebars","syntax":"mustache","template":"{\"objectName\":\"Devices\\\\KNX\\\\LAMP\",\"valueName\":\"Value\"}\n","output":"str","x":310,"y":660,"wires":[["1d8be5d180cf4986"]]},{"id":"726aed10423c5cb0","type":"template","z":"de16c5a1c842773b","name":"LEDA","field":"payload","fieldType":"msg","format":"handlebars","syntax":"mustache","template":"{\"objectName\":\"Devices\\\\KNX\\\\LEDA\",\"valueName\":\"Value\"}\n","output":"str","x":310,"y":580,"wires":[["1d8be5d180cf4986"]]},{"id":"dc776a5f69128e61","type":"template","z":"de16c5a1c842773b","name":"LEDB","field":"payload","fieldType":"msg","format":"handlebars","syntax":"mustache","template":"{\"objectName\":\"Devices\\\\KNX\\\\LEDB\",\"valueName\":\"Value\"}\n","output":"str","x":310,"y":620,"wires":[["1d8be5d180cf4986"]]},{"id":"daa4f233cd15bd45","type":"debug","z":"de16c5a1c842773b","name":"","active":true,"tosidebar":true,"console":false,"tostatus":false,"complete":"false","statusVal":"","statusType":"auto","x":710,"y":620,"wires":[]},{"id":"9fe6ae8a7a21a1a0","type":"inject","z":"de16c5a1c842773b","name":"LEDA","props":[{"p":"payload"},{"p":"topic","vt":"str"}],"repeat":"","crontab":"","once":false,"onceDelay":0.1,"topic":"","payload":"true","payloadType":"bool","x":150,"y":580,"wires":[["726aed10423c5cb0"]]},{"id":"2d5bd18a8dbe1717","type":"inject","z":"de16c5a1c842773b","name":"LEDB","props":[{"p":"payload"},{"p":"topic","vt":"str"}],"repeat":"","crontab":"","once":false,"onceDelay":0.1,"topic":"","payload":"true","payloadType":"bool","x":150,"y":620,"wires":[["dc776a5f69128e61"]]},{"id":"f990833b5fdf4f5c","type":"inject","z":"de16c5a1c842773b","name":"LAMP","props":[{"p":"payload"},{"p":"topic","vt":"str"}],"repeat":"","crontab":"","once":false,"onceDelay":0.1,"topic":"","payload":"true","payloadType":"bool","x":150,"y":660,"wires":[["7403291b3c84f273"]]},{"id":"72693191232f5890","type":"comment","z":"de16c5a1c842773b","name":"KNXデバイスの状態の取得","info":"","x":190,"y":540,"wires":[]}]
実行結果
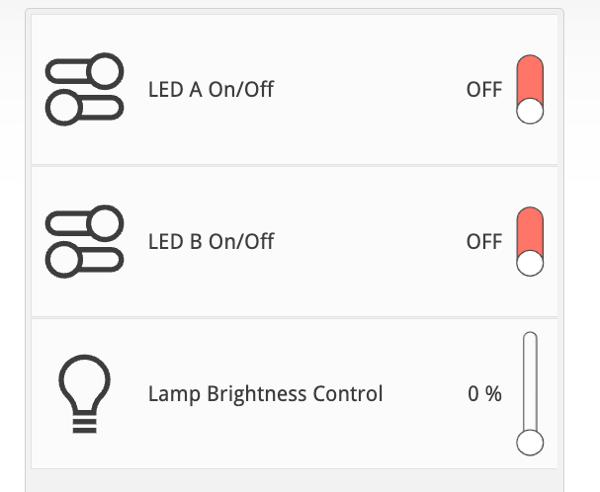
まずは全部Offのときに、各Injectノードを押すと、
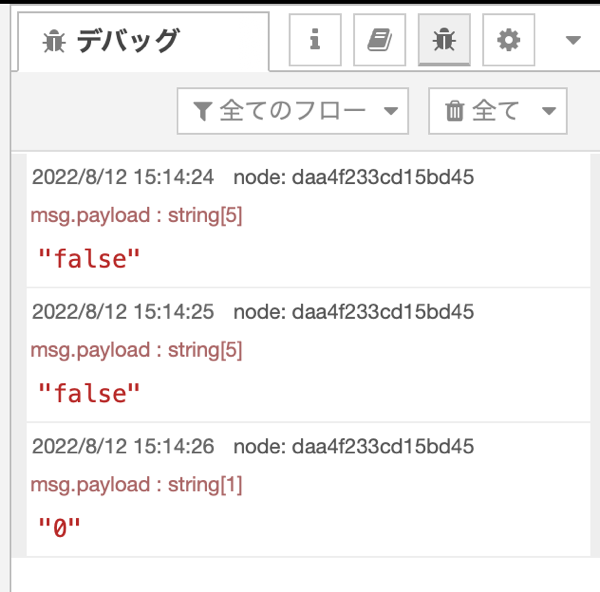
http requestのレスポンスとして、LEDAとBは”false”が、LAMPの方は”0″が返ってきました。
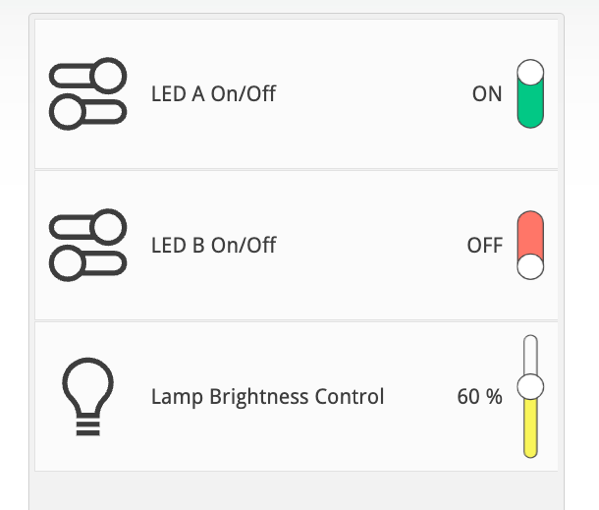
LEDAをOn、LEDBをOff、LAMPは60%にすると、
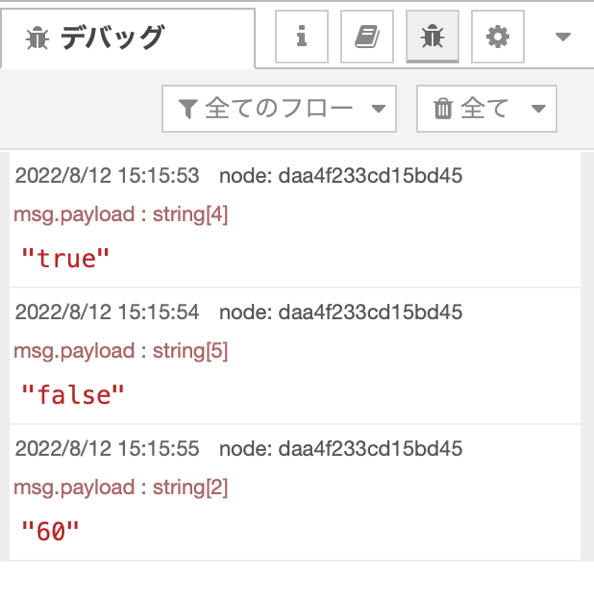
このように状態を取得することができました。
フローの解説
https://RPC_username:RPC_password@server_ip_address/API/RPC/GetValue

POST data example (Get light status): {"objectName":"Devices\KNX\Light 1","valueName":"Value"}
値を取得するには上記のような記述になります。
なので、LEDAのtemplateノードには
{"objectName":"Devices\\KNX\\LEDA","valueName":"Value"}
と記述、LAMPのtemplateノードには
{"objectName":"Devices\\KNX\\LAMP","valueName":"Value"}
として、http requestノードには
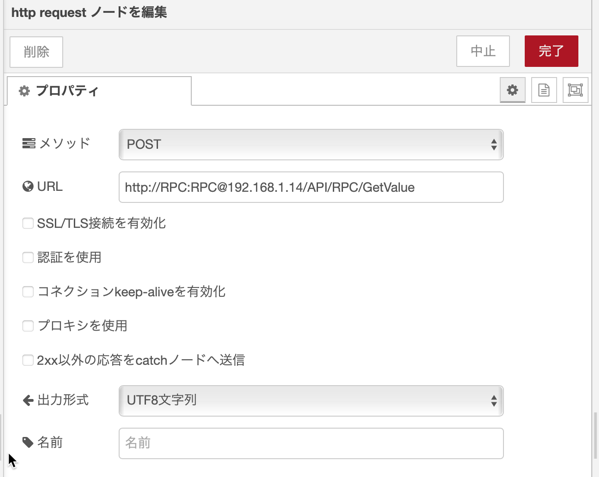
このようにすることで状態を取得することができます。
まとめ
以上、bOSのRPC機能を使ってNode-REDからKNXデバイスの状態を取得する方法をご紹介しました。

